
This tutorial explains how to create lasers in Minecraft for various purposes.
Lasers can be used as traps, to deter intruders by damaging or eliminating them. They can also transmit redstone signals, providing extra functionalities for redstone players. Additionally, lasers can be utilized for mining, allowing players to break blocks from a distance.
Lasers can also function as a ranged weapon, providing an effective line of defense or attack. Finally, lasers can be integrated into security systems, triggering alarms or activating defense mechanisms when intruders pass through the laser beam, strengthening your base’s security.
We’re going to cover:
- How to create vectors that go from one point to another, and we’ll display the laser with particles.
- Arching vectors and modifying the height of the laser.
- Moving particles through its trajectory with a certain speed to create a bullet affect.
- Checking if the laser is going intersecting a block to prevent it from passing through.
Notice: We use the Foundation library building on top of Spigot/Paper API which is optional. Should you not want to use it, simply replace the parts of the code with their native alternative or open our GitHub link above to see how we did it.
Creating a laser
Let’s code a method that creates a laser that goes from point A to point B. We’ll name this method “spawnLaser” which will take 2 different locations as its parameters.
public void spawnLaser(Location locationA, Location locationB) {
We now need to calculate the distance to stop the laser when it reaches point B.
double distance = locationA.distance(locationB);
Now let’s create the vector that goes from location A to location B. To accomplish this, we subtract a copy of locationB with locationA, the reason we clone locationB is because we don’t want to modify it in case we use it later.
After subtracting both of these locations, we use “toVector()” which is used to convert the result into a vector, we can then normalize the vector which sets it to 1 and we multiply that number to scale the vector by a factor of 0.5. You may adjust this value to your needs.
					Vector vector = locationB.clone()
.subtract(locationA).toVector().normalize().multiply(0.5);
Next, we need to create a new Location object that is a copy of locationA. This object will be used to represent the current position of the laser beam as it is being spawned.
Location laserLocation = locationA.clone();
Finally, we need to loop through the distance in increments of 0.5.
Each iteration of the loop represents a new position along the laser beam. We then use the cloned “laserLocation” and add the small vector portion for each iteration allowing us to then spawn a particle at this location.
					double increment = 0.5;

for (double totalDistance = 1; totalDistance; distance; totalDistance += increment) {
   laserLocation.add(vector);

   CompParticle.REDSTONE.spawn(laserLocation);
}
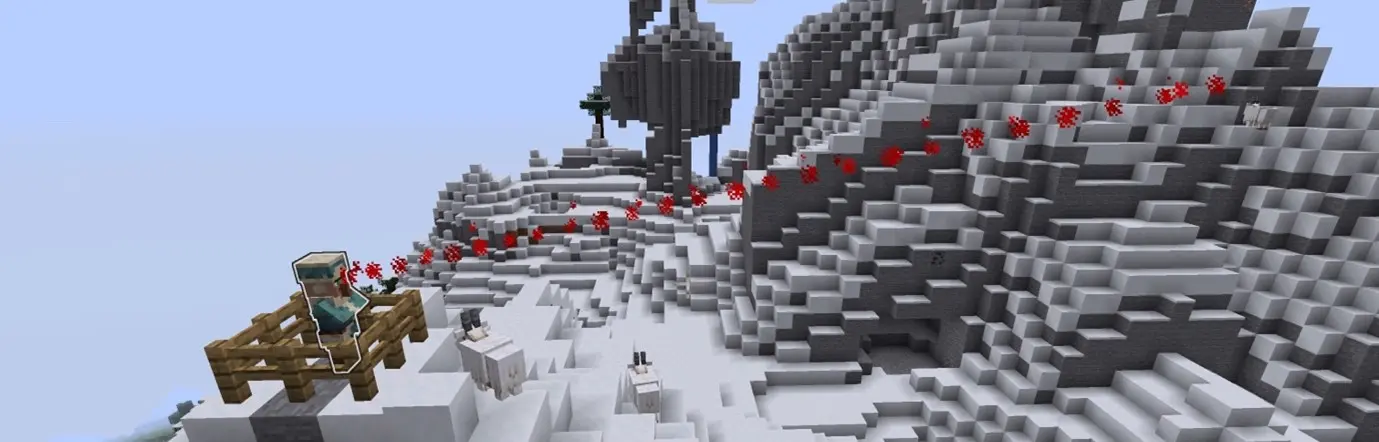
Here’s an image illustrating the result of this method:
Creating an arched laser
Now that we know how to create a laser that goes in a straight line lets go through arching the vector. The method we’ll be creating is called “spawnArchedLaser”, this will take 3 parameters “locationA”, “locationB” and “heightOffSet” which will determine the height of the arc for the laser.
public void spawnArchedLaser(Location locationA, Location locationB, double heightOffset) {
First, we need to get the world and distance between both locations that we’ll use later in the method.
					World world = locationA.getWorld();
double distance = locationA.distance(locationB);
Now we need to calculate the differences between the X, Y, and Z coordinates of “locationB” and “locationA” by subtracting the location points. These values will be used to determine the direction and orientation of the laser.
					double xDiff = locationB.getX() - locationA.getX();
double yDiff = locationB.getY() - locationA.getY();
double zDiff = locationB.getZ() - locationA.getZ();
Let’s now define how many particles should be spawned along the length of the laser trajectory and how far apart they should be. “trajectoryCount” determines the number of particles to be spawned, and trajectoryInterval determines the spacing between them. A larger value for trajectoryCount will result in a smoother-looking arched laser.
					int trajectoryCount = 80; // Larger count for smoother trajectory
double trajectoryInterval = distance / trajectoryCount;
Now that we have our values, lets create a for loop that iterates from 0 to the distance value, in increments of the “trajectoryInterval” we created previously. Each iteration of the loop represents a new position along the arched laser.
In this for loop we calculate the X, Y, and Z trajectory coordinates of the current position along the laser. “s” is the ratio of the current distance to the total distance, “trajectoryX” and “trajectoryZ” are calculated using the initial X and Z coordinates added to the xDiff and yDiff values that are multiplied with “s” ratio allowing us to get each point along the trajectory. The “trajectoryY” is calculated using a sin function that takes “s” and the “heightOffset”. This is what causes the laser to arch upwards in the middle and arch downwards to get to “locationB”.
Finally, we can display the laser in the for loop by spawning particles at a new location using the “trajectoryX”, “trajectoryY” and “trajectoryZ” coordinates that we calculated above:
					for (double totalDistance = 0; totalDistance; distance; totalDistance += trajectoryInterval) {
     double s = totalDistance / distance;
     double trajectoryX = locationA.getX() + xDiff * s;
     double trajectoryY = locationA.getY() + yDiff * s + heightOffset * Math.sin(Math.PI * s);
     double trajectoryZ = locationA.getZ() + zDiff * s;

     Location particleLocation = new Location(world, trajectoryX, trajectoryY, trajectoryZ);
     CompParticle.REDSTONE.spawn(particleLocation);
   }
}
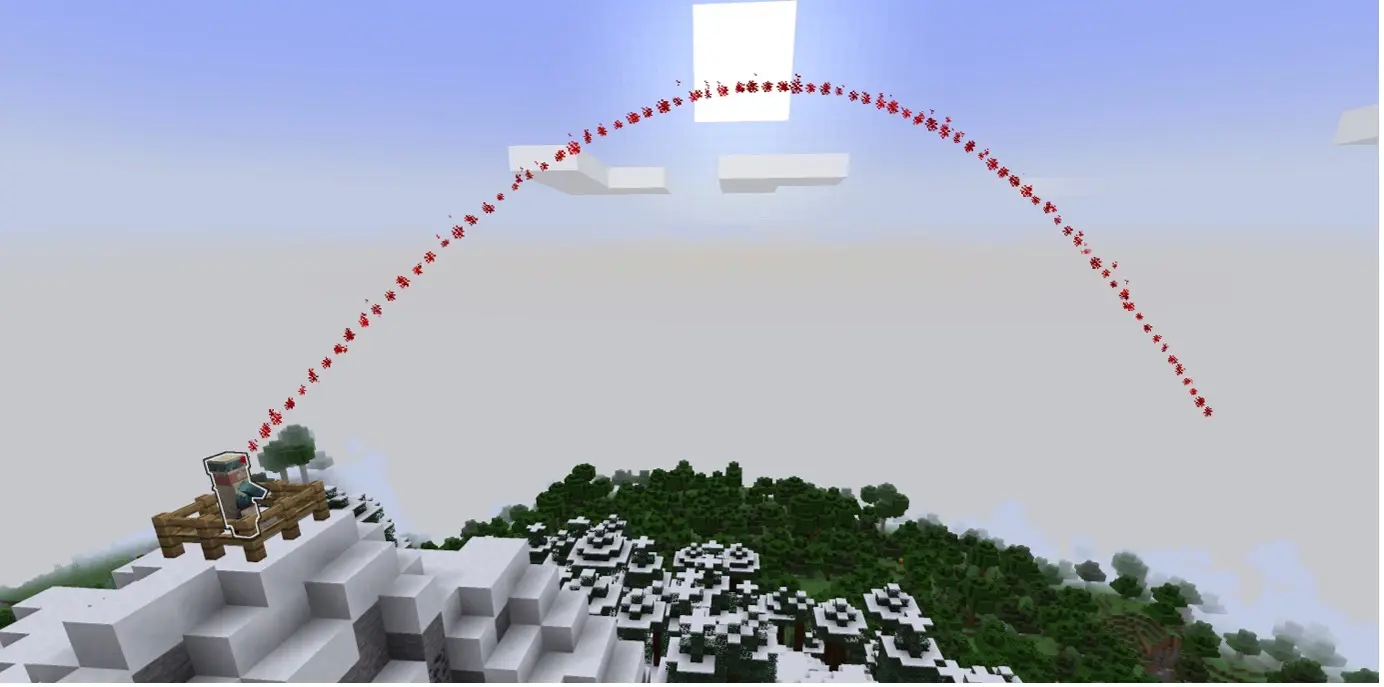
Here is an image that demonstrates the output of this method when a height offset of 8 is applied:
Creating a particle bullet
Now that we know how to create a horizontal and arched laser effect, let’s attempt to simulate a bullet effect by moving the particles along the trajectory.
Let’s start with the arched laser trajectory we’ve created.
We can simply accomplish a bullet affect by using “Common#runLater”, this allow us to schedule the spawning of a particle at the current position along the laser’s trajectory, with a delay that is proportional to the current distance from the start of the laser. This means that particles will be spawned along the trajectory at a rate that depends on the distance from the start of the laser, simulating a bullet effect.
					Common.runLater((int) (totalDistance / trajectoryInterval), () -> {
    CompParticle.REDSTONE.spawn(particleLocation);
});
For the horizontal laser, we’ll first rename the increment variable to “particleDelay” which makes more sense as we’ll use that variable to set the delay based on the distance travelled which will simulate a nice bullet affect.
					Common.runLater((int) (totalDistance / particleDelay), () -> {
    CompParticle.REDSTONE.spawn(laserLocation));
}
However, we will also need to calculate the ratio to move the particles across the trajectory similarly to what we did when we created the arched laser.
Checking for intersections
To check if the laser is intersecting a block or an entity there is a simple method we can implement into our laser creating method.
We’ll name this method “hasIntersected” which takes in a location object and a radius, the radius represents the width of the laser, I’d recommend setting this value to 0.3.
We then use “Remain#getNearbyEntities” to get a collection of all nearby entities within the specified radius.
The method then uses an OR (||) logical operator to check if the collection of entities is not empty, which means there is at least one nearby entity within the specified radius or the block at the specified location is solid.
					public boolean hasIntersected(Location location, double radius) {
   Collection entities = Remain.getNearbyEntities(location, radius);

   return !entities.isEmpty() || location.getBlock().getType().isSolid();
}
Here is the final result of what we’ve accomplished in this episode:
A laser bullet method that stops when it hits a block or a target:
					public void spawnLaserBullet(Location locationA, Location locationB) {
   World world = locationA.getWorld();
   double distance = locationA.distance(locationB);
   double xDiff = locationB.getX() - locationA.getX();
   double yDiff = locationB.getY() - locationA.getY();
   double zDiff = locationB.getZ() - locationA.getZ();

   double particleDelay = 0.5;

   for (double totalDistance = 1; totalDistance < distance; totalDistance += particleDelay) {
      double s = totalDistance / distance;
      double trajectoryX = locationA.getX() + xDiff * s;
      double trajectoryY = locationA.getY() + yDiff * s;
      double trajectoryZ = locationA.getZ() + zDiff * s;

      Location particleLocation = new Location(world, trajectoryX, trajectoryY, trajectoryZ);

      Common.runLater((int) (totalDistance / particleDelay), () -> {
          CompParticle.REDSTONE.spawn(particleLocation));
      }

      if (hasIntersected(particleLocation, 0.3))
         break;
   }
}
An arched Laser that stops when it hits a block or a target:
					public void spawnArchedLaser(Location locationA, Location locationB, double heightOffset) {
   World world = locationA.getWorld();
   double distance = locationA.distance(locationB);
   double xDiff = locationB.getX() - locationA.getX();
   double yDiff = locationB.getY() - locationA.getY();
   double zDiff = locationB.getZ() - locationA.getZ();

   int trajectoryCount = 80; // Smaller count for smoother trajectory
   double trajectoryInterval = distance / trajectoryCount;

   for (double totalDistance = 0; totalDistance <= distance; totalDistance += trajectoryInterval) {
      double s = totalDistance / distance;
      double trajectoryX = locationA.getX() + xDiff * s;
      double trajectoryY = locationA.getY() + yDiff * s + heightOffset * Math.sin(Math.PI * s);
      double trajectoryZ = locationA.getZ() + zDiff * s;

      Location particleLocation = new Location(world, trajectoryX, trajectoryY, trajectoryZ);

      Common.runLater((int) (totalDistance / trajectoryInterval), () -> {
          CompParticle.REDSTONE.spawn(particleLocation));
      }

      if (hasIntersected(particleLocation, 0.3))
         break;
   }
}
That’s it for today! I hope that you’ve enjoyed this tutorial, let me know below if you have any questions and I am happy to help.
-Jack
About Jack
Jack joined MineAcademy in 2020 and has been developing Minecraft plugins and Java-related software ever since. Click here to read his story.
Want to learn coding plugins like this?
Since 2018, we run an entire training for Java and Spigot/Paper Minecraft plugins coding. Click here to start coding your own Minecraft plugins and learn more.