Learn how to make Minecraft plugins in under 15 minutes even if you’ve never coded anything before.
This guide is for people wanting to build unique Minecraft networks or simply get into Minecraft plugin development.
I wrote this article a bit longer than others because I want you to understand why things actually work, not just get a finished code to copy-paste.
- This guide works for Minecraft 1.7.10 to 26.1 and Java 8 or newer.
- It works for Bukkit, Spigot, Paper API and its forks such as Purpur.
- It requires no previous coding nor Minecraft plugin development experience.
Prefer a video tutorial? I made over 60 videos on plugin development including source codes:
Step 1: Install Java
Pick The Right Java Version To Make Minecraft Plugins
Summary: You need the right type, distribution and version of Java.
Type: To play Minecraft, you need Java Runtime Environment (JRE). To develop Minecraft plugins, you need JRE and Java Development Kit (JDK). The JDK includes a compiler to transform your code into a single jar file.
Distribution: Multiple companies build Java. We do not recommend Java from Oracle, because it requires a paid license for commercial and production purposes (such as if you make money from streaming Minecraft or running a Minecraft server). Instead, we will use Microsoft OpenJDK which is the officially tested JDK for Minecraft.
Version: Minecraft 26.1 requires Java 25. For Minecraft 1.20.5+, use Java 21, for 1.18-1.20.4 use Java 17 or newer. For Minecraft 1.8.8-1.16 we recommend Java 8.
Install Java JDK
Use the link below to download the right package for your operating system. For macOS the installation process is fully automatic.
Notice for Windows: We recommend selecting the “msi” package. During the installation process, make sure to select “Set JAVA_HOME variable” so that when you are running your Minecraft server on your computer it can easily find Java and use it to start itself.
Get Java JDK here (see above which version you need):
https://learn.microsoft.com/en-us/java/openjdk/download
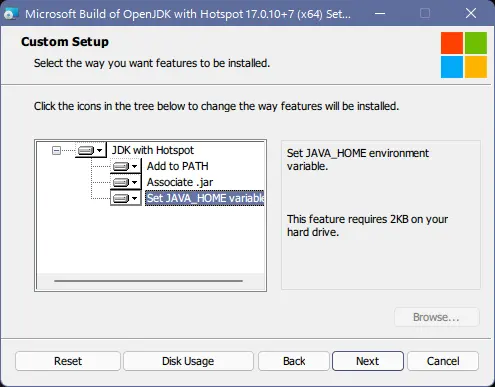
When installing Java on Windows, make sure to tick the “Set JAVA_HOME variable” option so that your Minecraft server launching script can find Java and start the server.
Step 2: Configure Your OS And Install Additional Software
Summary: You need to enable your operating system to show all file extensions to avoid issues. We also recommend getting a text editor with unicode support.
Step 1. Show all file extensions
To avoid hidden issues such as paperclip.jar.jar being shown as paperclip.jar later we need to setup your macOS/Windows to show file extensions.
Click here for a macOS guide (use All Files section) and click here for Windows guide on showing file extensions.
Step 2. Install a UTF-compatible text editor
 When editing files for your Minecraft server or your plugins you need to use a tool which supports Unicode encoding, such as emojis or non-English letters.
Notepad or WordPad (for Windows) or TextEdit (for macOS) have issues properly saving files with unicode encoding, you risk having to reset your entire configuration if you use them!
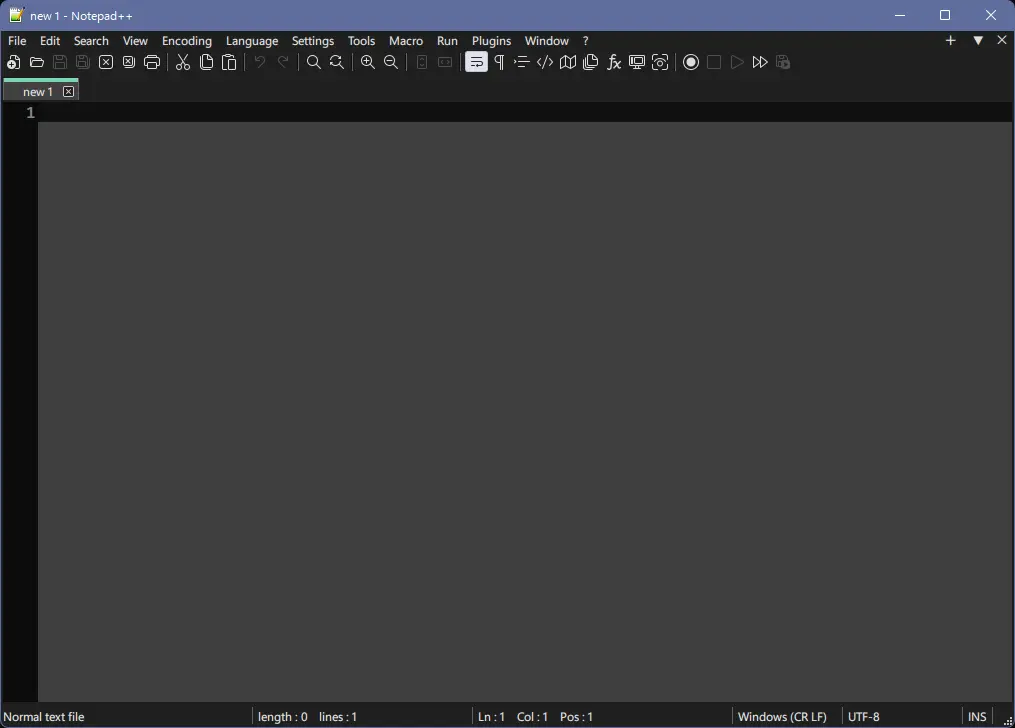
We recommend getting Notepad++ for Windows or Sublime Text for macOS or Linux to open and edit your plugin files easily. You can simply drag and drop your files inside these programs (such as .yml files for your plugin configuration) and edit them directly.
Step 3: Install an IDE
Summary: You need a computer program to write your plugins code in. We recommend IntelliJ Community Edition.
An IDE stands for Integrated Development Environment, in short, it is a computer program that will help you write Java applications.
There are two most popular IDEs, IntelliJ and Eclipse. We will be using IntelliJ because it is considered to be the modern standard used by Google developers to write Android apps. It has a lot of inspections to help beginners write better code and is easy to navigate.
Get IntelliJ Community Edition from this link (scroll down to see the Community edition, which is free): https://www.jetbrains.com/idea/download/?section=windows
Step 4: Write Your Minecraft Plugin
There are a ton of ways to start writing your first Minecraft plugin but not all of them are beginner-friendly, and time efficient.
If you have heard about it, we do not recommend using the Minecraft Development plugin for IntelliJ. It only provides a limited plugin creation GUI and doesn’t add extra features once you are already developing your plugin, which is where you’ll be spending 99% of your development efforts.
Instead, we recommend you download PluginTemplate which is an fully functional Minecraft plugin shell ready to be customized. It works on any Minecraft version and can easily be tweaked to use Bukkit, Spigot or Paper API.
Notice: PluginTemplate comes with the default and paper branch. The default package uses our Foundation framework. In this tutorial, we will be using the paper branch which supports Minecraft plugin development for Bukkit, Spigot and Paper API.
Download PluginTemplate (“paper” branch)
Visit https://github.com/kangarko/PluginTemplate/tree/paper (make sure you are on the “paper” branch), click “<> Code” and select “Download ZIP” to download the template to your disk.
Do not open it in IntelliJ yet. We need to be editing a pom.xml (see below) before importing the project.
1. Unzip the folder — Unzip the file and place the content of the folder inside to a suitable directory where it will stay during your development time. Do NOT use OneDrive or Google Drive to store Minecraft plugin source code because cloud storages cause issues with cache files IntelliJ creates.
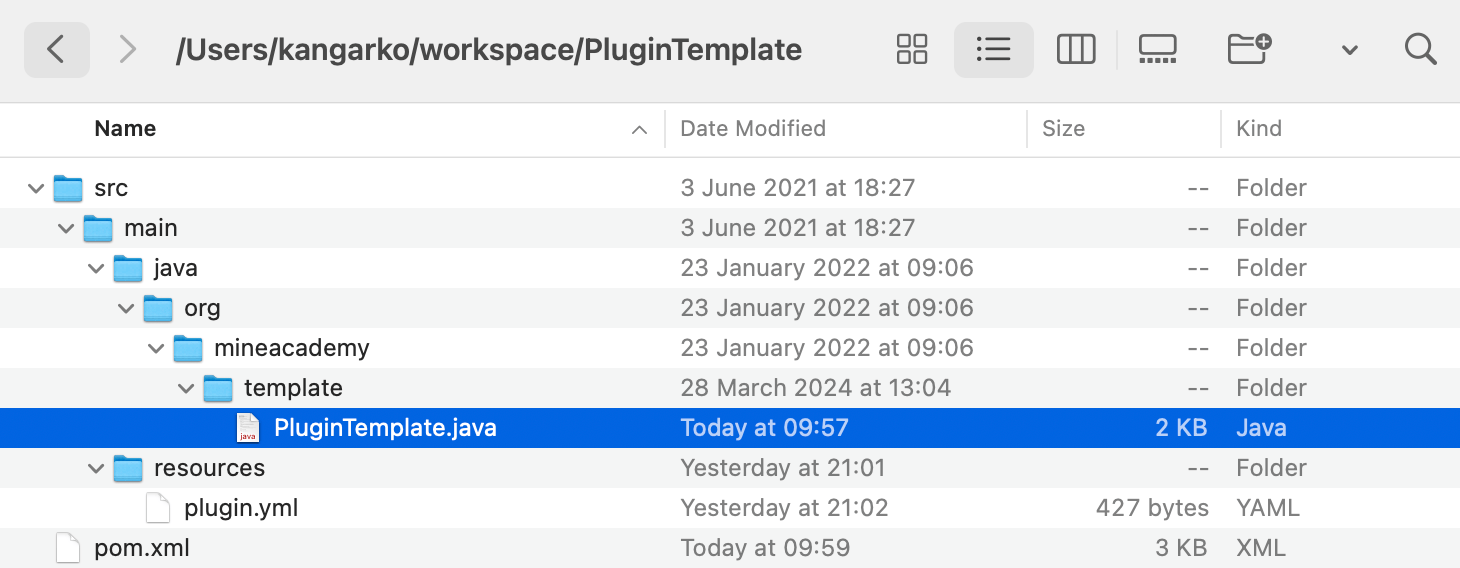
2. Clean the folder — Remove README.md from the downloaded folder. You can also remove .gitattributes and .gitignore unless you want to store your files in a Git repository. Here’s how your folder structure should look like:
3. Edit pom.xml — Then, edit the pom.xml file. The pom.xml gives instructions to Maven on how to compile your plugin. Maven is a build system to help us compile and put together all of your plugin’s files into a single .jar file you can then install to the plugins/ folder.
Edit the following keys:
<groupId> — Change this to your reversed domain name. That means if you own domain mineacademy.org, then it’ll be org.mineacademy. If you’re gmail is [email protected] then it could be com.gmail.john1995. If you don’t have either just put me.yourname. Make sure it’s all lower case without spaces or non-English letters and letters or numbers only.
<artifactId> — The name of your plugin. Just like group id, the artifact id must also be all lower case without spaces or non-English letters and letters or numbers only.
<name> — The name of your plugin (without the restrictions in artifact id).
Inside <properties>, edit the following subsections:
<author> — Your in-game nick name. This is used in plugin.yml, the file we described above.
<main.class> — Where you main class that starts the plugin is located.
The main class is found in the long tree of directories in the “main” folder in “src” ending with the class name. The logic behind these “org”, “mineacademy” and “template” is similar to group id and artifact id.
These names do not matter (strictly speaking), but if it important you following consistent and established coding standards to make your code clean, readable and appealing to other developers or maintainers.
After editing these keys, you are done! It’s time to import your plugin and start using it.
By the way, here are some optional keys which you don’t need to edit yet:
<version> — The version of your plugin, we recommend starting at 1.0.0 and working up to 1.0.9 and then 1.1.0 and so on. Change this on each of your plugin’s public release.
<java.version> — It’s recommended you use the minimum required Java version for Minecraft (see Installing Java above for which Java is the minimum required for which Minecraft version). Please note that plugins compiled on Java 8, Java 17 etc. will continue to function on Java 21 and higher. However, plugins compiled on Java 21 will not load on anything older.
A note on plugin.yml
You have perhaps noticed a file called plugin.yml inside src/main/resources folders.
Similarly to the pom.xml, Bukkit (Spigot/Paper/Purpur) also needs a file with instructions on how to start your compiled plugin.
This file is called plugin.yml. It’s been premade to require no modifications when you’re getting started. We will be editing this file later when we want to add commands to our plugin, hook it with other plugins or libraries or other things. You can see all available options for plugin.yml here.
Step 5: Open Your Plugin In IntelliJ
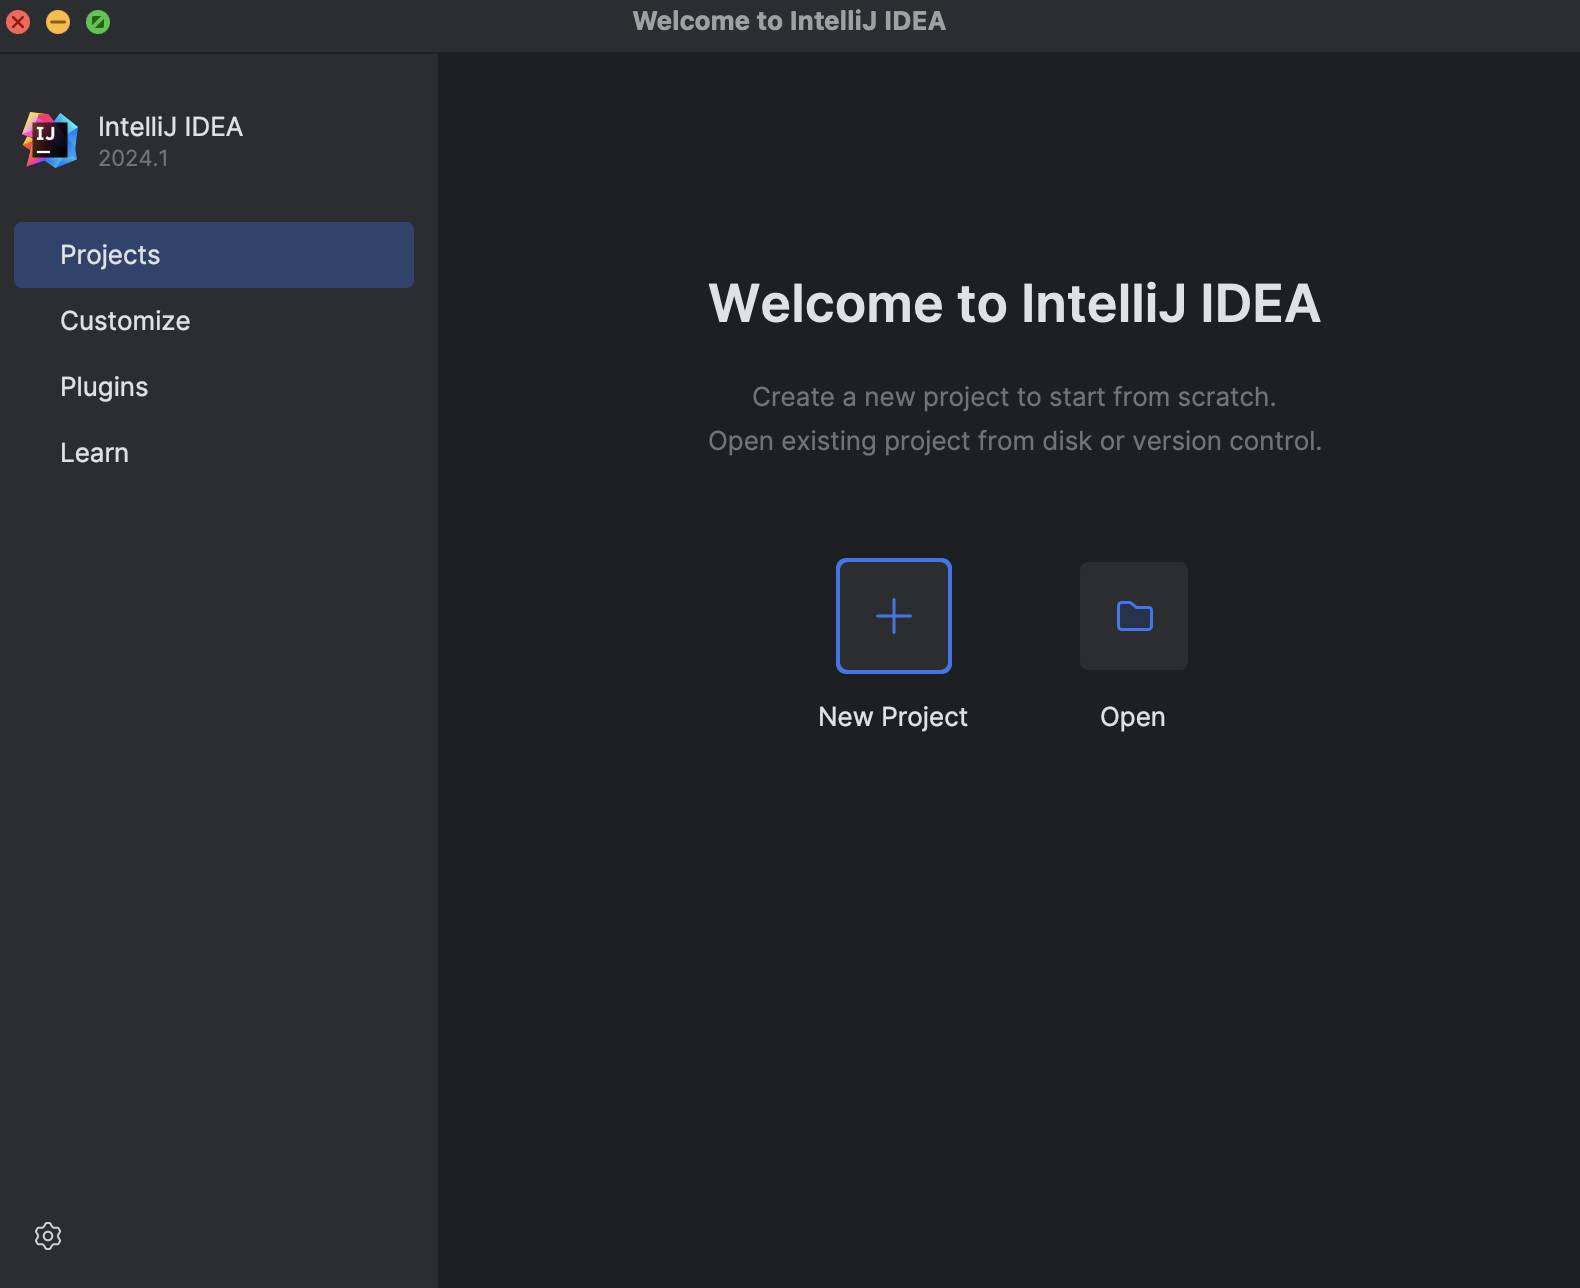
Once you’ve made initial changes to your plugin, open IntelliJ. If you already have another project opened, click File, go to Open. If you see the window below, click Open right away.
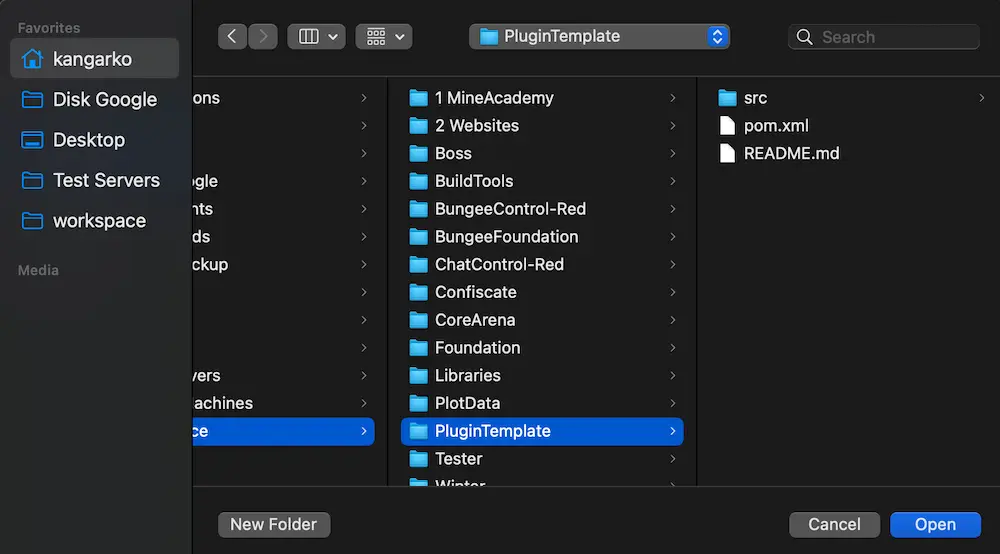
In the above window, navigate to your root project directory and open it as a project.
After opening it, you should see Project files explorer to the left, and the main window which displays the source code of each file to the right.
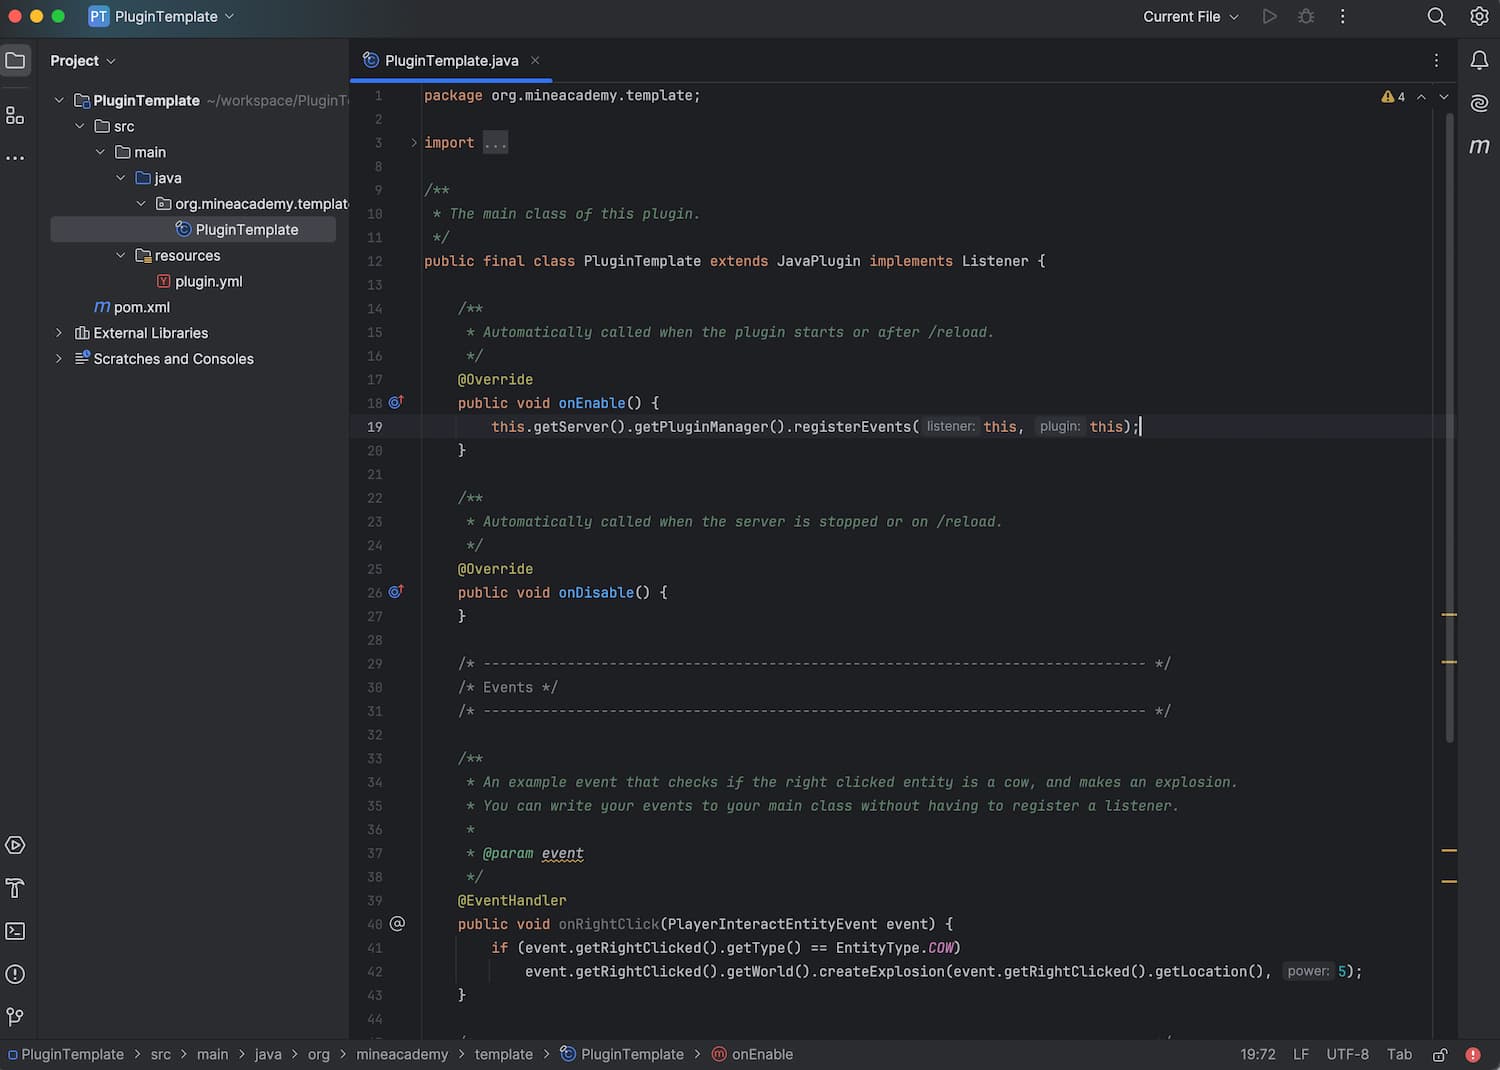
In the example below, I have double-clicked and opened the PluginTemplate file, which is the main file where your plugin starts. I’ll describe how the class works below. Here’s how it should look like:
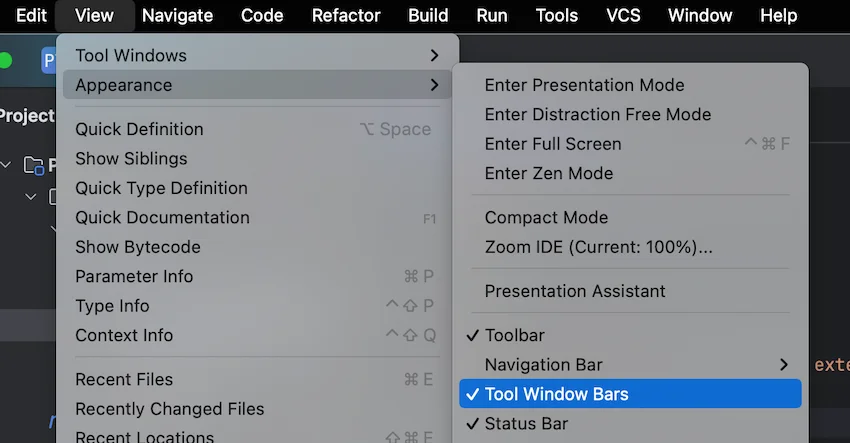
Tip: You can maximize your coding space by going into View > Appearance and disabling Status Bar and Tool Window Bars. You generally don’t need these extra windows.
Step 6: Edit Your Plugin
Your Plugin’s Structure
First, let’s look at all files found inside your plugin’s source code:
- pom.xml — As described above, this file gives instructions to Maven, the build system we use to put together all project files into a single plugin .jar.
- src/main/java folder — Stores Java code for your plugin. Each subfolder within this folder structure is a part of each class’ package.
- PluginTemplate — The main class (with Java source code) that is started when the Minecraft server having this plugin starts or shuts down.
- src/main/resource folder — Stores other non-Java files such as your config. These files are included in the plugin’s jar.
- plugin.yml — As described above, this file gives instructions to Bukkit, Spigot, Paper or Purpur on how to start your Minecraft plugin.
Breakdown Of The Main Plugin’s Class
Let’s break down the code in your main plugin’s class, line by line.
Don’t worry if that seems too complicated for you now, I’ll share how you can learn the Java programming language in its complete form below and it’s easier than it looks 😉
Package declaration
Every class in Java starts with a package declaration. This must be exactly the same as the folders structure we discussed above.
To rename your main plugin’s class or move it to a different package, simply right click the package or the class name on the left panel in IntelliJ under Project, then click Refactor and select Rename.
IntelliJ will remove the old folders, make the new ones and move all classes there automatically.
Imports
Every time you use another class which is in a different package you must import it using the import statement. IntelliJ can manage imports automatically and you can enable Optimize Imports On The Fly option in its settings.
We have access to classes in the org.bukkit package because we are importing Paper API (or Spigot if you so desire) in pom.xml.
IntelliJ reads the file and downloads the API jar in the background to a hidden .m2 folder inside your Users folder. The jar is then made available to your project. The same API is also available on the server.
Comments
Comments in Java begin with // for single-line comments, and /* or /** for multi-line comments. They are ignored by the compiler and won’t appear in your plugin jar.
The class declaration
The “public” is an access modifier enabling Bukkit API to call your plugin’s class since it’s public.
The “final” keyword means nobody can extend the class (because there’s no purpose to it, only by accident) and the “extends JavaPlugin” means we ourselves are extending JavaPlugin class.
By extending a class we mean that we share the fields and methods from JavaPlugin class. That way, Bukkit API can properly find and launch our plugin.
The “implements Listener” means we are attaching an interface “Listener” to our class. Interfaces are also classes. Every file in Java is a class. Bukkit needs every class you want to listen for game events, such as player joining or chatting, to implement a Listener. We’ll talk about that later.
The onEnable and onDisable() methods – main plugin methods
The “@Override” is an annotation which means there is already a method (a function) by the same name in the class we are overriding, JavaPlugin. We are overriding this method to add custom behavior to the plugin when the server starts or is reloaded.
The “public” is an access modifier as explained above, the “void” means that the method does not return any result, the “onEnable” is the name of the method (if it would be anything else, than @Override could not be used and it would not get called automatically), the () brackets mark that this is a method, and are empty because the method does not take in any arguments (data), and then there’s an opening { bracket and } at the end of the method.
Let’s break down the line “this.getServer()…”:
The “this” means we are reading methods or fields in this instance of our class. The server automatically makes a new instance of your plugin when it is loaded.
In our class (“this class”), we call getServer() which is a method found in JavaPlugin that returns the Minecraft server class. In this class, we call getPluginManager() which returns a plugin manager class and inside of that class we finally call the method registerEvents().
This method registers events and takes two parameters, the plugin, which is “this” since we can reference our current instance, and the class which implements listener, which is again “this” since our very class does it.
Similarly to onEnable(), Bukkit automatically calls the method onDisable() whenever your plugin is disabled by the server stopping or being reloaded.
The onRightClick() method – making entities explode on right click
Because your main class implements a listener and we registered events in it, we can make special methods that Bukkit will find automatically and call whenever the event described in the method is fired.
To do this, we need to preface the method with @EventHandler annotation that will let Bukkit identify that this is an event method. The method needs to be public and a void. Inside its arguments, place exactly one argument, which is one of the hundreds of available plugin events depending on whether you are using Spigot, Paper or Purpur API.
Inside our example method, we listen for PlayerInteractEntityEvent which is fired on right click on any entity. In the method body, we first declare a variable Entity and save the right clicked entity to it. We then check if the entity type equals to a cow and create an explosion at the entity’s location with the power of 5.
I encourage you to change the entity type and the explosion power and get some fun results out of this!
Step 7: Export Your Plugin As A JAR
After you’re done editing your code, we need to make a new run configuration and call Maven to compile and export our project as a plugin jar file.
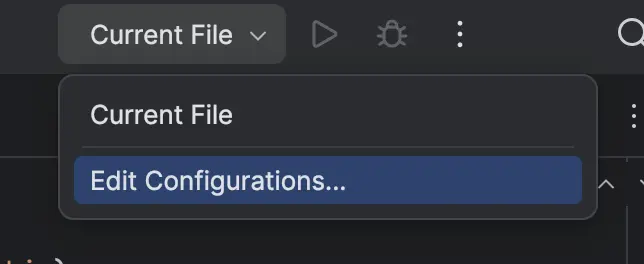
To create a new edit configuration, navigate to the upper right hand corner, click Current File and click Edit Configurations…
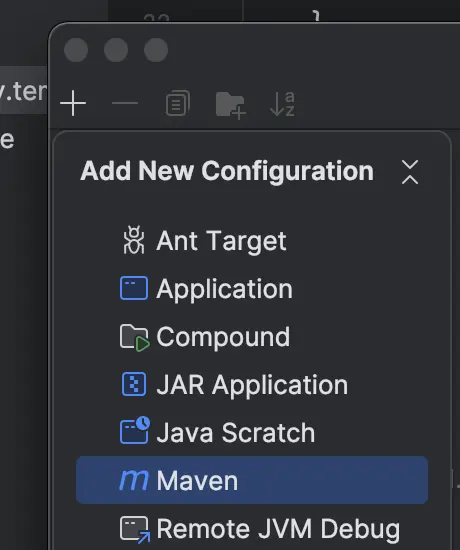
In the new window, click the upper left icon + and select Maven from the list of options to add a new Maven configuration:
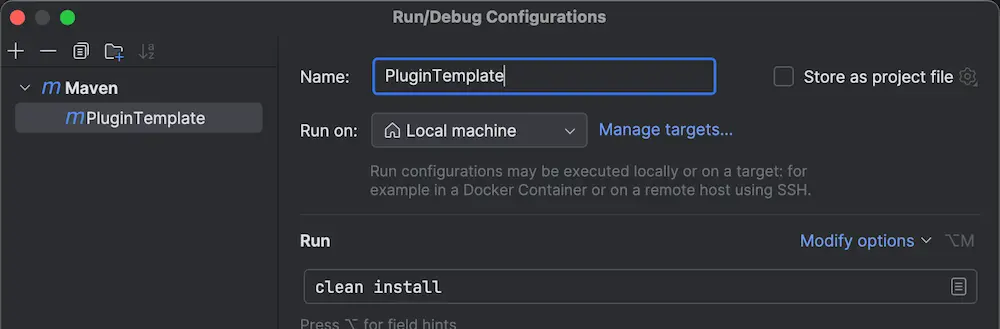
Then we need to configure Maven to compile our plugin. The name does not matter, we recommend you set it to match your plugin name for clarify.
Under Run, type “clean install”. The clean argument will remove your previous build artifacts to ensure a clean build, the install argument will compile the plugin and place a copy into your .m2 folder inside Users folder so that you can hook your plugin with other plugins if you so desire later.
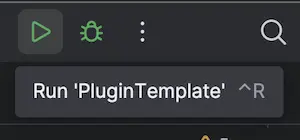
After you apply changes and close the window, you should see a green play icon. Click it and select “Run” with your project name. This should start the compile process.
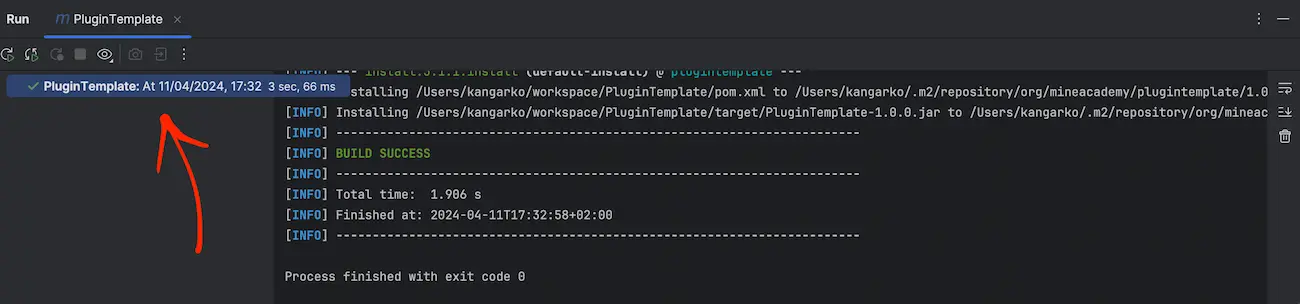
A new bottom window should open with the console printing Maven compile messages. In most instances, you can ignore all Maven warnings as long it says BUILD SUCCESS at the bottom.
If you can’t see the full console log, click on the top most label as marked by the red icon below:
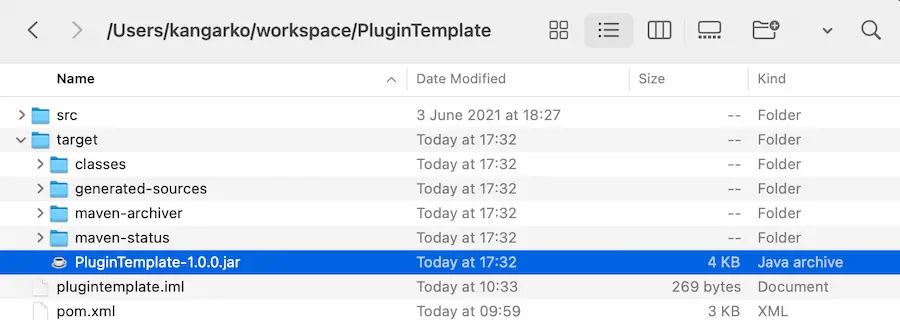
After a successful build, a new folder “target” will appear in your plugin’s source folder. You’ll find your plugin jar ready to be installed there. In case you have multiple jar files there, use the biggest one typically named “PluginName-Version.jar”.
Step 8: Test Your Plugin On A Server
If you do not have a Minecraft server, we recommend installing one to your computer. It’s free, and there is no delay in connection to it so you can test your plugins the fastest, and save time.
Click here to learn how to create a local Minecraft server on your computer.
If you don’t have a local Minecraft server yet, see the bottom of this page for an article on how to create it in under 7 minutes.
Place the plugin jar into your plugins/ folder and start your server.
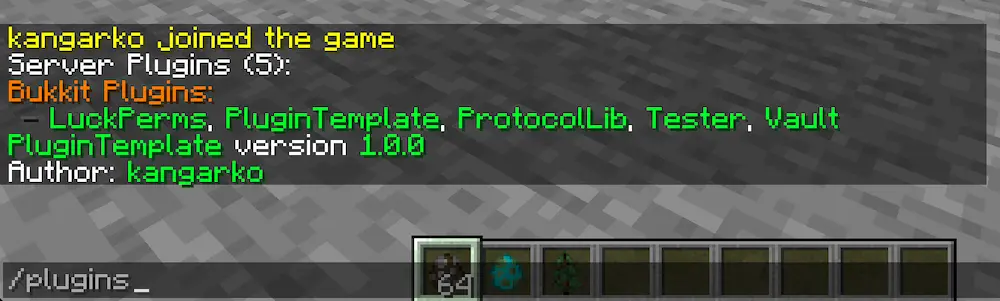
In the game, we can verify that the plugin has been enabled successfully by typing /plugins. As long as you see your plugin showing up in green, it’s loaded.
You can also check your console startup log for any errors related to your plugin loading.
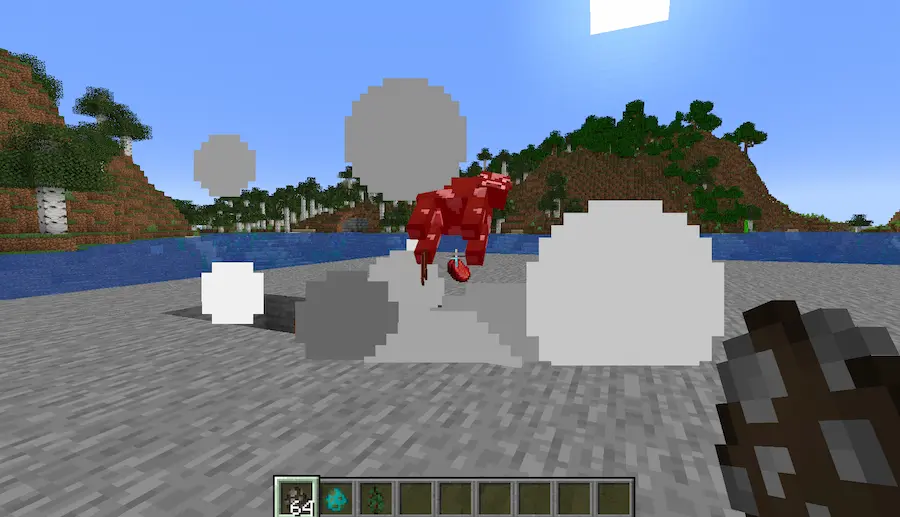
We can now test the exploding cows functionality by spawning a cow and right clicking it:
And just like that, we’ve made your first Minecraft plugin!
What a journey, congratulations! Want to do more cool stuff with your plugin? Keep reading…
Step 9: Master Minecraft Plugin Development
You need to learn Java programming language and as Bukkit/Spigot/Paper API for you to understand which methods to write and how to make the features you want in your plugins.
Learning Java will often feel too slow, because most tutorials focus on topics we don’t need when developing Minecraft plugins.
However, you must learn Java to understand Minecraft plugins because Minecraft and plugins are written in Java.
If you skip to learning just Minecraft plugins you will lack the crucial understanding on writing clean, efficient code and will unavoidably end with bugs, frustration and lack of ability to reflect and improve your code.
We strongly advice against using ChatGPT or other AI-related tools for beginners because they often confuse different API versions and can’t check code for syntax errors. They often give mixed results and “invent” code, sometimes they print methods that don’t even exist in Bukkit.
Luckily, there is a specialized training which combines Java and Bukkit/Spigot/Paper API to help you get the complete knowledge about developing Minecraft plugins in just a few weeks.
It’s called Project Orion and it comes with pre-recorded video lessons, downloadable source code materials, all paid software licenses you’ll need and most of all, twice-a-week live coding sessions on Zoom where you’ll get your code reviewed by experts.
Project Orion includes an entire Java training and requires no prior programming knowledge. If you already know Java you can just skip the intro parts, the training is made to fit all experience levels and you can work through it in your own time, and your own schedule.
Click here to learn more about Project Orion – a complete Java + Spigot/Paper API training for developing Minecraft plugins (beginner to advanced)