
Welcome back to Episode Two of our Minecraft plugin development series.
Click here to see the first episode where I explain what Bukkit, CraftBukkit, Spigot, Paper NMS, packets are and how plugins work.
In this episode, we’re going to cover:
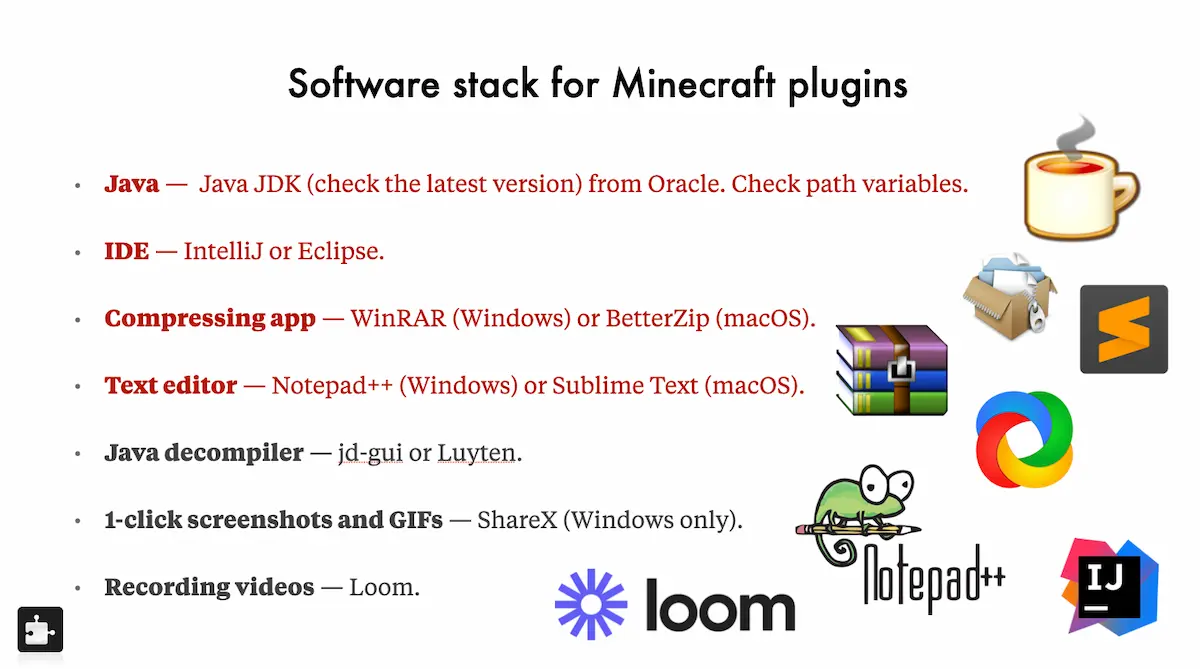
- All of the software and tools I use (free) — Installing Java and necessary software stack.
- Assembling a test server — How to setup a Minecraft server for testing: Launching scripts, debug plugins and performance tweaks.
- How to compile a Minecraft plugin — Tweaking IntelliJ and compiling your first Minecraft plugin.
Downloadable resources:
- Server launching scripts
- Tester plugin download
- Vault plugin download
- ProtocolLib plugin download (for latest MC version)
- LuckPerms plugin download
Source Codes:
Upgrading Your Computer
To code Minecraft plugins, you need to install Java. Java is a coding language in which Minecraft and plugins are written. To code plugins, you need to know Java a little it – click here to learn more about Project Orion to help you learn Minecraft plugins which includes a full Java course especially designed for plugins.
Step 1: Installing Java
Removing past traces
Before installing Java, make sure no other version is installed on your computer. This is handy since multiple versions can cause conflicts. I will show you how to run multiple Java versions safely in a separate episode.
You can just google how to uninstall Java for your platform.
Downloading Java
Get Java JDK (I recommend the latest version, or google which Java is required by your Minecraft version) from this link and install normally.
Step 2: Picking and installing an IDE
IDE means Integrated Development Environment. In simple words, IDE is an app which developers use to write code. You can of course you any text editor such as Notepad, but it doesn’t support turning your code into a single file (a process called “compiling”) and provides no help nor syntax high-lightning.
Which IDE should I pick?
IntelliJ or Eclipse are two most popular IDEs to code plugins. From our research, most men prefer IntelliJ IDEA since it’s the easiest to setup and provide tons of help such as completion suggestions and error checks, especially handy for beginners.
Installing IntelliJ IDEA
IntellIJ IDEA is made by JetBrains and can be downloaded at this link. In our Project Orion training course, which is a full training on coding Minecraft plugins, we give you access to the Ultimate Edition free of charge, but for now, Community edition is enough.
Step 3: Installing a decompressing app
You need to be able to decompress .ZIP, .RAR and other archives to use tools and software relevant for plugins. By default, macOS and Windows can only open .ZIP files, so you need a third party tool to get the job done.
I recommend WinRAR for Windows and BetterZIP for macOS. On Linux you can just google any of the available software.
Step 4: Installing a text editor
Minecraft servers come with .YML, .JSON, .PROPERTIES files which you can’t easily open using your computer’s default software. Avoid using programs like Word or WordPad like the plague because they will corrupt the encoding of your files and it will be a short process for them.
I highly suggest getting Notepad++ minimalistic portable edition if you use Windows, or Sublime Text for any other platform.
In the above video, I will show you how to make your plugin and test server files open with these apps by default.
Step 5: Installing optional software
Note that those are NOT affiliate links. I have been testing and using all software below for years and confirmed it saved me weeks of effort. You are welcome getting an alternative as long as it will serve you.
Getting a decompiler
Throughout my learning journey I was always curious to see how other plugins are made. I did not care much about licensing and I would open up competitor’s plugins and try to decompile them. While I do recommend taking licenses into consideration now, if you are like me then you’d surely enjoy the ability to open any .jar file and see what the code does.
That’s when a decompiler comes handy — I do suggest jd_gui or Luyten. In IntelliJ if you hold CTRL (command on macOS) while hovering over any class in a library you don’t have source code access to, it will use its own, native decompiler too, but I still suggest having a tool on your Desktop for the other stuff.
Note: Some plugins use obfuscation to make the code look like garbage (i.e. hasKillaura(Player player) becomes a(A a)) or crash your decompiler. That is not your decompiler’s fault, please don’t smash your keyboard. As I explained in the first episode of this training, Minecraft server itself is obfuscated. Your best effort would be to look at features the plugin does and try to code them yourself – that’s why you’re learning this skill, aren’t you? 😉
Installing a 1-click screenshots and GIFs tool
Ever needed to press one button to make a screenshot of a region on your screen and upload it to imgur.com automatically? On macOS, we have SHIFT+command+4 shortcut, on Windows, to my knowledge there’s none.
I recommend getting ShareX for Windows to take pictures and even video of your screen (or its parts) – it also contains lots of tools such as HEX color picker and will automatically copy the imgur.com URL of the captured picture to your clipboard, saving you precious time.
If you use Linux, try asking the internet, I’m pretty sure there’s tons of free tools available.
Recording videos
If you want the next level, get Loom. It starts to record your screen and your microphone (and even camera if you dare) with one click, automatically uploading it to its servers in an undisclosed location and giving you the URL in your clipboard.
I use it when a customer needs extra explanation, I can shoot him a 30-second loom video instead of writing email and capturing 5 screenshots. Saves tons of time.
Taking notes
I recommend Evernote to take digital notes, in its Premium edition it will also index your images and PDF attachments if you search for a keyword. You can use it for learning, saving code snippets (but beware, I’d recommend using a tool like Github Desktop for saving entire source of programs, we’ll discuss that later) and organize all areas of life.
How to Setup a Minecraft Server To Test Plugins
The best way to test Minecraft plugins is to run a local Minecraft server on your computer. I don’t recommend paying for any hosting companies because it will take you much longer time to see code changes, and especially if you’re getting started, you’ll do quite a lot.
Step 1 — Download Paper from papermc.io
We’ll be using Paper from papermc.io as it’s the easiest to get started with, all you need to do is download the jar and place it into a new folder somewhere on your computer, for example name the folder “Minecraft server”.
Step 2 — Use our launching scripts to start the server and accept the EULA.
Click the link at the top of this article to download our server launching scripts. Place the appropriate file for your operating system into your folder where you placed Paper .jar file, and rename the Paper .jar file to “paperclip.jar”.
Run the server. The first time it will complain about EULA and shut down, you need to open the newly generated eula.txt file in your server folder, and set “eula” key to “true” while the server is stopped. Start again and it should keep generating worlds until it says “Done”.
Step 3 — (Recommended) Install Tester, Vault, ProtocolLib, LuckPerms plugins and do performance tweaks.
I recommend following the video above at this point since we do further optimizations to the server, such as removing nether and end worlds as well as disabling packet compression and lowering view distance for maximum performance.
There are some plugins that are extremely helpful to test your Minecraft plugin and provide basic functionality, I have listed them in the resources section on top of this article and highly recommend downloading all of them.
Creating Your Plugin
We recommend you download and install the Minecraft Development extension for IntelliJ that automates a few steps creating a plugin.
Click New Project in your Welcome to IntelliJ window (or click File > New > Project from the menu window), select “Minecraft” from “Generators” left panel.
I recommend you set the following options as per the image below:
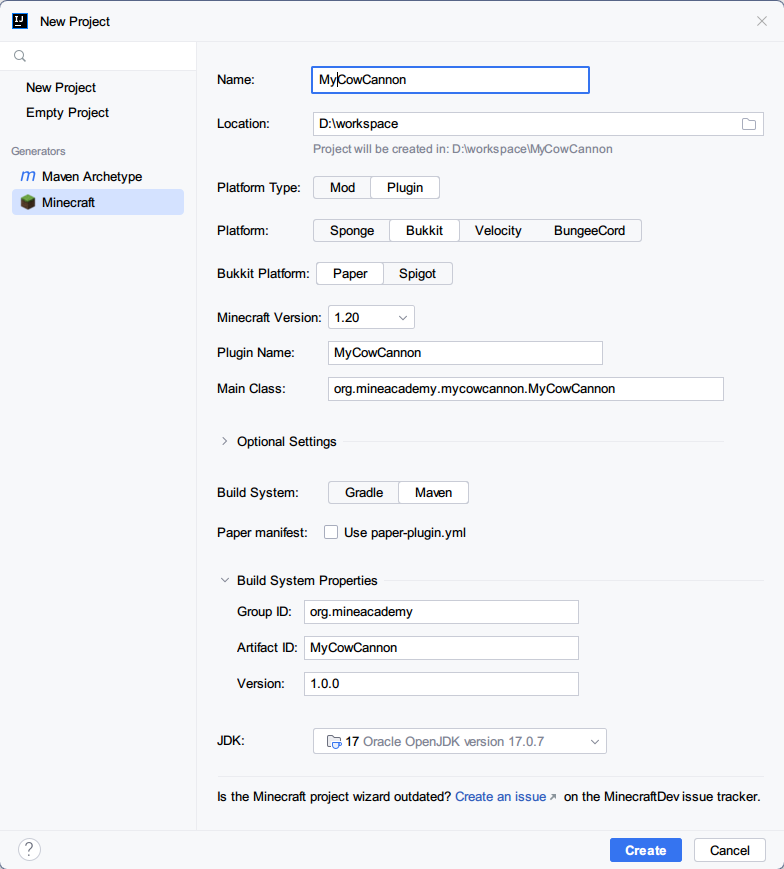
Here are some of the options, explained:
- Name: Set it to the same as plugin name.
- Location: Set a location where the source code will be located. I like to keep it organized and place all source codes in “workspace” folder inside my user folder.
- Platform Type: Select Plugin. See our first article to learn the difference between Mods and Plugins.
- Bukkit Platform: If you want your plugin to support Spigot and Paper, select Spigot. If you want your plugin to only support Paper, select Paper.
- Minecraft Version: Ideally set to highest or whatever you need if you have custom needs.
- Plugin Name: Set this to your plugin name, again, I do recommend not using spaces to avoid issues later on.
- Main Class Name: Means where your main plugin class that will be loaded first is located. People typically put it somewhere logical, like “go.to.hell.myplugin”. Just kidding, that is not where you should put it. Use the “<GroupId>.<ArtifactId>.<PluginName>Plugin”. So if my package name is “org.mineacademy” and artifact id is “sphere”, it’s gonna be “org.mineacademy.sphere.SpherePlugin”. For the sake of clarity I always prefix my main class with the -Plugin ending such as BedWarsPlugin, BossPlugin etc. And for Lord’s sake, don’t name your main class “Main”, not only that’s lame but also utterly confusing and generic.
- Optional Settings: Put your name to authors and the rest pretty much can be empty if you’re starting out. Experienced developers probably don’t read this article anyways, but if you want to see what each other option does, click to read this SpigotMC article.
- Build System: Use Maven. This is a tool helping us compile (compress all files to a single .jar) our plugin
- GroupId: This is a package name of your plugin; such as a reversed domain.
- Examples: email address (if yours is [email protected] then your package can be com.gmail.johnsmith97), or your website (i.e. mineacademy.org becomes org.mineacademy) or name (me.johnsmith)
- ArtifactId: Set this to your plugin’s name. Use lower case, English-only letters please and replace spaces with hyphens, such as plugin “BedWars” is going to have ArtifactId “bedwars” and My Pets will be “my-pets” or “mypets”. Generally I don’t recommend making spaces in Minecraft plugin names, just connect it all together such as MyPets.
- Version: I recommend keeping it simple and setting it to 1.0.0.
- JDK: IntelliJ should show the installed Java JDK you downloaded above such as Java 17.
Hit create and it will generate the plugin skeleton for you! Be cautions to let the IntelliJ finish importing, for most computers this takes about 1-2 minutes – watch for the working indicator at the bottom bar to disappear.

After IntelliJ has finished importing all dependencies (such as Spigot API), it should look something like this:
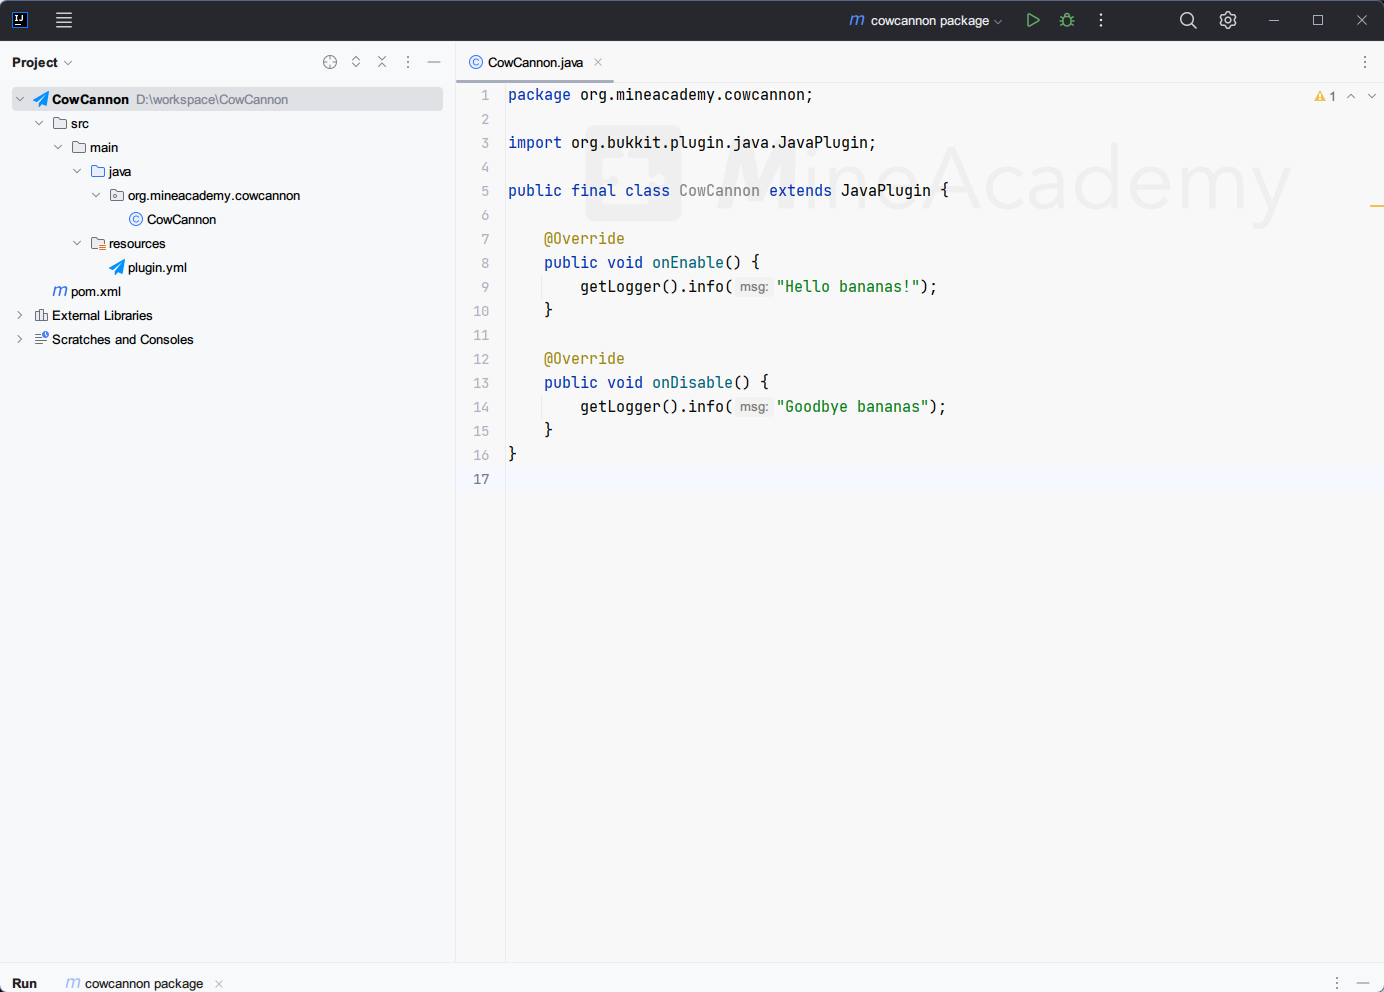
That’s it! Now you’re ready to start coding your plugin!
Compiling Minecraft Plugins & Testing
Testing the plugin
To the if everything works, you can place “getLogger().info(“Hey”);” on line 10 inside the onEnable() method.
How to export your Minecraft plugin
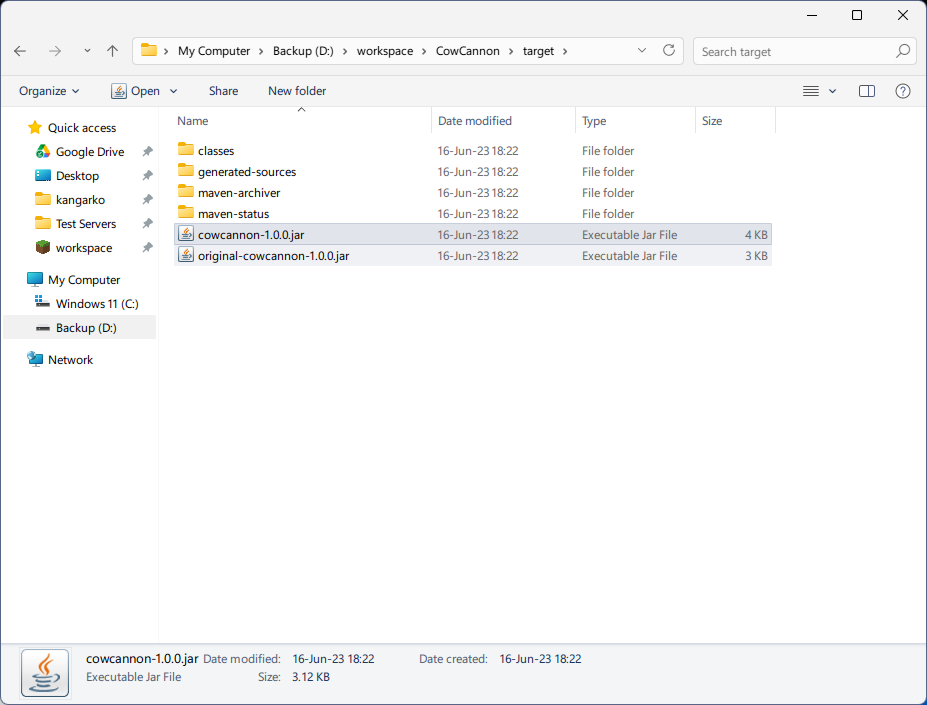
To compile your plugin source code, click the green “>” button. The console should start running, finishing by saying “BUILD SUCCESS” at the bottom once it compiles the code.
All you need doing is copy the .jar from the newly created “target” folder inside the source folder (the one without original- prefix is the .jar file you need) to plugins/ folder of your test server, and see the logger message in the console when the server boots up to check if everything is working fine!
Plugin Structure Analysis & Final Tweaks
I highly recommend following the training video at this point, because I go into greater depth of how the plugin skeleton is structures (i.e. what is pom.xml, what is plugin.yml inside src/main/resources (if you open up the plugin folder structure on the left Project panel you will see it).
Here are some further steps I recommend doing:
- Set api-version to 1.13 in plugin.yml (see above on how to find the file): This will make your plugin theoretically work on any Minecraft version, since by default that key is equal to whatever version you set during the setup wizard (i.e. 1.20) and won’t load on older MC versions. MC older than 1.13 ignores that key completely.
- That is not to say your plugin will work, but it won’t artificially be blocked from loading. We will cover multi Minecraft compatibility in further videos.
- I am doing further tweaks in IntelliJ’s settings in the end of the video training, I do recommend you check it out since those will make your code align and format automatically and save you tons of time! It’s at the end of the video.
- Example: Search for “build automatically” in your IntelliJ settings and enable it on, this option will make IntelliJ look for syntax and other errors much faster as you type. There’s more options, I again recommend you see the video!
Next Steps
If you enjoyed this tutorial and want a complete guide to code Minecraft plugins, check out Project Orion. It’s a full fledged training tried and tested by 2,000+ people showing step-by-step on how to make plugins, advanced systems (minigames, custom mobs, antipiracy, dungeons, claims etc.) and best yet, I am doing live calls multiple times each week and connect with you in our community to answer any and all questions you have.
It’s just so much better experience than any free tutorial since I can pour my time and heart into it with greater depth and our platform is custom coded with features we need for it specifically. Check it out!