
Forking Paper and working with Patches is so extremely frustrating topic most people can’t figure it out.
From my testing, not even a single AI model can figure out. However, this is going to be a beginner-friendly guide that will walk you through making your first ever edit to the Paper Minecraft server.
In this guide, you’ll learn:
- How to clone Paper from their Github repo
- How to edit files not requiring a patch
- How to edit NMS files and create patch
- How to submit a pull request back to Paper
Official resources:
- Paper Contributing Guide – Great for general understanding but a bit dated and some commands are different now.
Requirements:
- A basic understanding of Java & Minecraft ecosystem (learn here)
- An IDE with gradlew support, IntelliJ Community is recommended
- Git
Careful with:
- GitHub Desktop Client – While I love to use it, I found it broken when using patches. You can still use it to clone the project and get a general overview of your commits, but do not use it to create them (explained below).
Step 1: Cloning Paper
Clone https://github.com/PaperMC/Paper.git to a folder where you want to store Paper using Git:
git clone https://github.com/PaperMC/Paper.git
It should say something like:
					C:\Users\kangarko\Desktop\Paper>git clone https://github.com/PaperMC/Paper.git
Cloning into 'Paper'...
remote: Enumerating objects: 369738, done.
remote: Counting objects: 100% (46199/46199), done.
remote: Compressing objects: 100% (3081/3081), done.
remote: Total 369738 (delta 43318), reused 43305 (delta 43045), pack-reused 323539 (from 4)
Receiving objects: 100% (369738/369738), 122.76 MiB | 16.07 MiB/s, done.
Resolving deltas: 100% (269988/269988), done.
Updating files: 100% (4249/4249), done.
Step 2: Importing Paper to IntellliJ
Now, let’s import the folder into your IDE of choice. I’ll show you how to do that in IntelliJ. Open it, close any existing project if it is already opened, then on the main screen select Open, navigate to your Paper folder and open it.
Wait a few minutes until the loader in the bottom right of your IDE finishes downloading.
Now, let’s configure your IDE so that Gradle (the build tool that helps to compress all source code files into a single jar) is available right in your IDE to save you time.
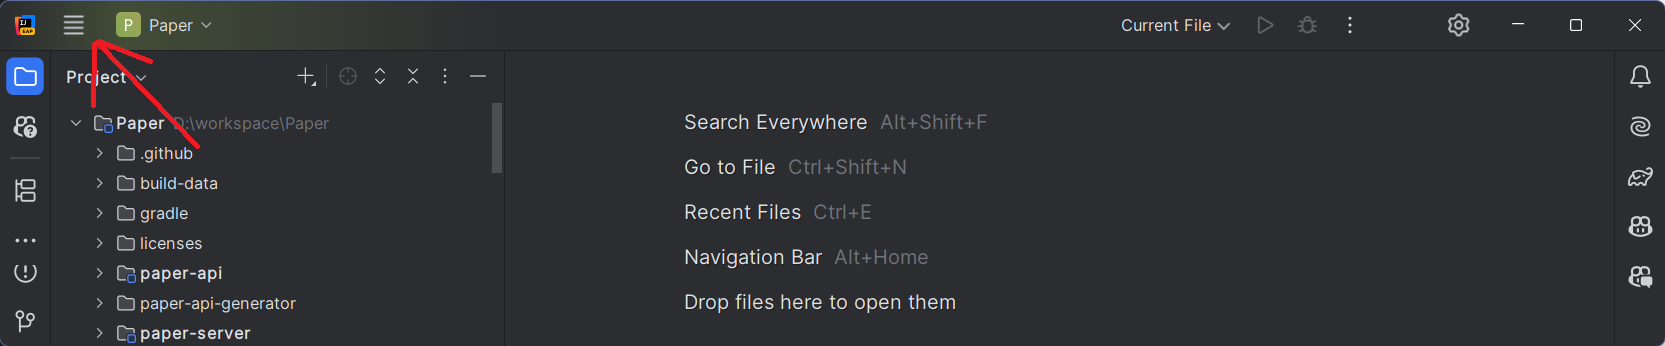
To show Gradle, start by opening the hamburger menu:
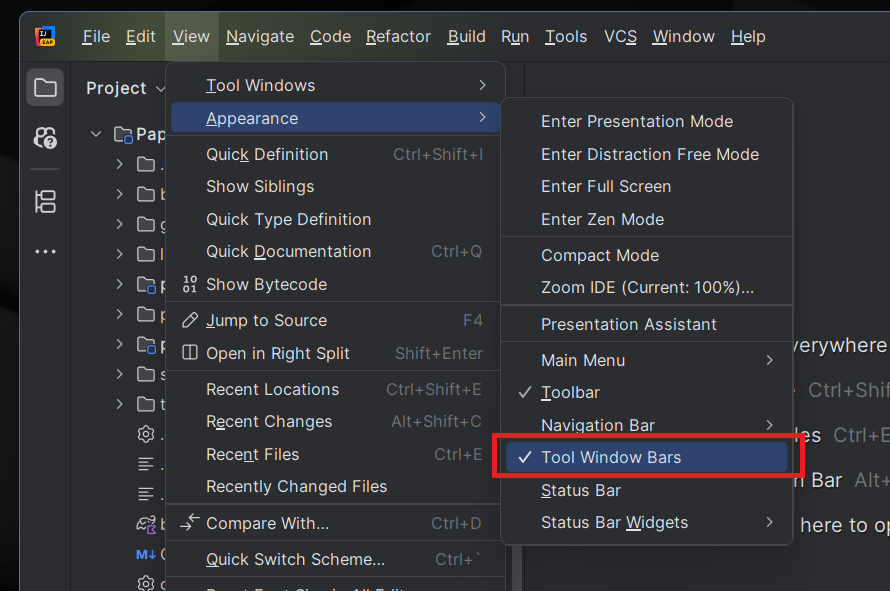
Next, click View then Appearance and make sure to tick Tool Window Bars.
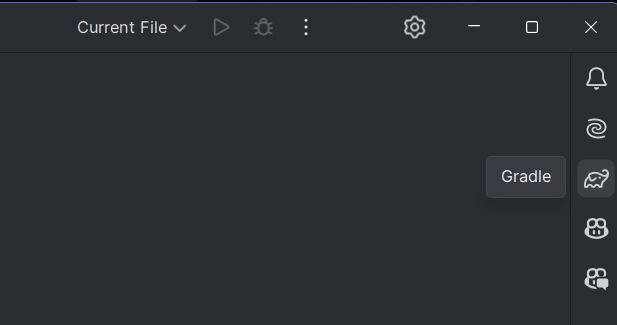
Now, on the right panel, you should see a Gradle icon. Click it to open the panel.
Can’t see Gradle? Click on the gear icon (see the image below as well), click Plugins. In the Plugins window, open Installed tab, type Gradle in the search file inside of it and make sure it is ticked on.
Step 3: First Run
Let’s compile everything and test your server before making changes. This will also download additional files and run scripts to help us with patching later on.
Simple: Running Gradle from IntelliJ
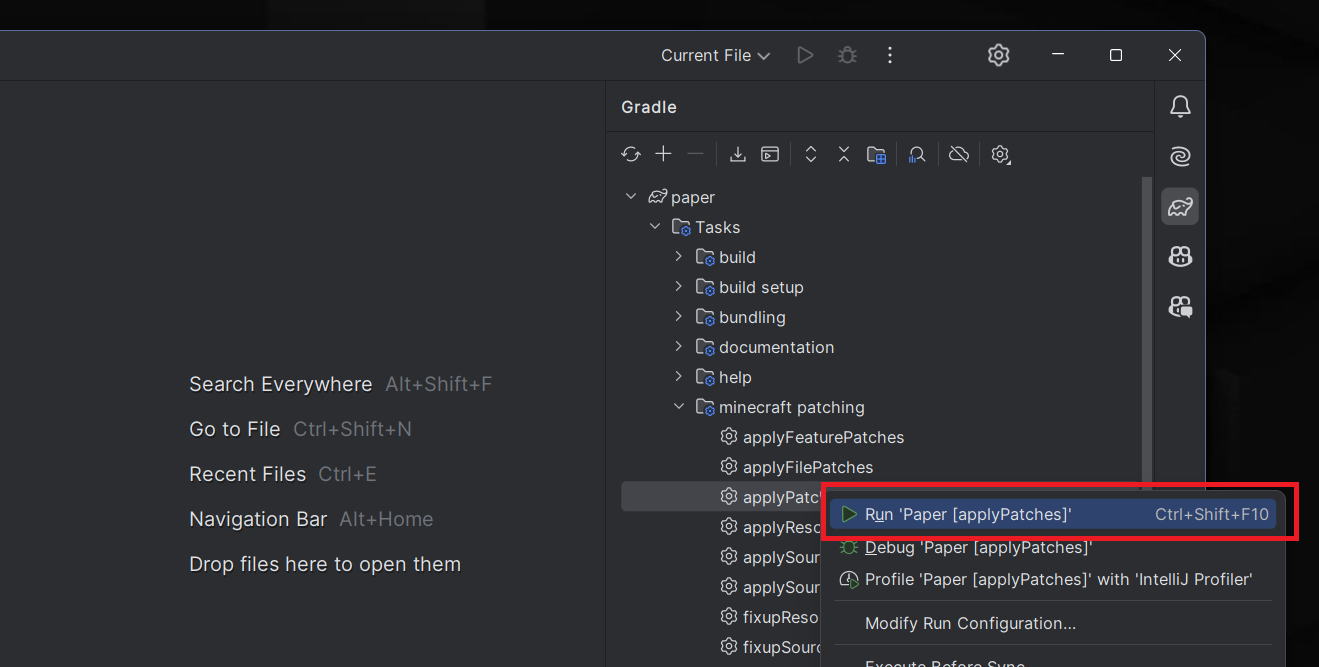
To first time compile Paper into a single jar, run two gradle tasks:
- applyPatches in paper > tasks > minecraft patching
- createMojmapBundlerJar in tasks > bundling
Here is how to find the first task:
Keep in mind this will take a few minutes to compile at first. You MUST wait until you get BUILD SUCCESSFUL message in the console to move forward.
For me, the entire Paper folder has over 70k files, talking about overengineering!
Alternative: Running Gradle From Terminal/CLI:
If you prefer not using this visual approach to run Gradle tasks, you can use your terminaL:
					./gradlew applyPatches
./gradlew createMojmapBundlerJar
Note: Some operating systems require you to use .\ instead of /.
Troubleshooting
If you run any issues at this point, I recommend closing IntelliJ, deleting the Paper folder, deleting the .gradle folder in your Users folder and reimporting everything again.
Applying patches failed for me once I tried switching branches for another Minecraft version and back. I had to delete the folders above and clone the repo again to fix this.
I also recommend opening Task Manager (Windows) or similar and force closing all java processes in case you accidentally double-click a jar and it runs in the background now or Gradle process got stuck. Or best yet, just restart your computer.
Join our mineacademy.org/discord to get further help on compiling
All MineAcademy students get 1-1 coaching support on live Q&A calls every week.
Testing The Server
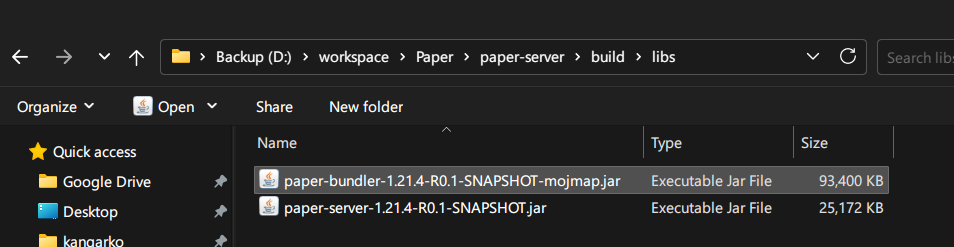
After running the two tasks, you can find the compiled jar in the paper-server/build/libs directory.
See this article on how to start a server jar.
Grab the largest file there, place it to your server folder and use one of the launching scripts from the above article to start the server. It should start normally and load all of your plugins. The only difference should be the commit and build date in the /version command.
Step 4: Making Changes
As a rule of thumb, if a file exists directly in the GitHub repository of Paper, you can edit it normally.
You can then commit your changes to your fork and create a PR.
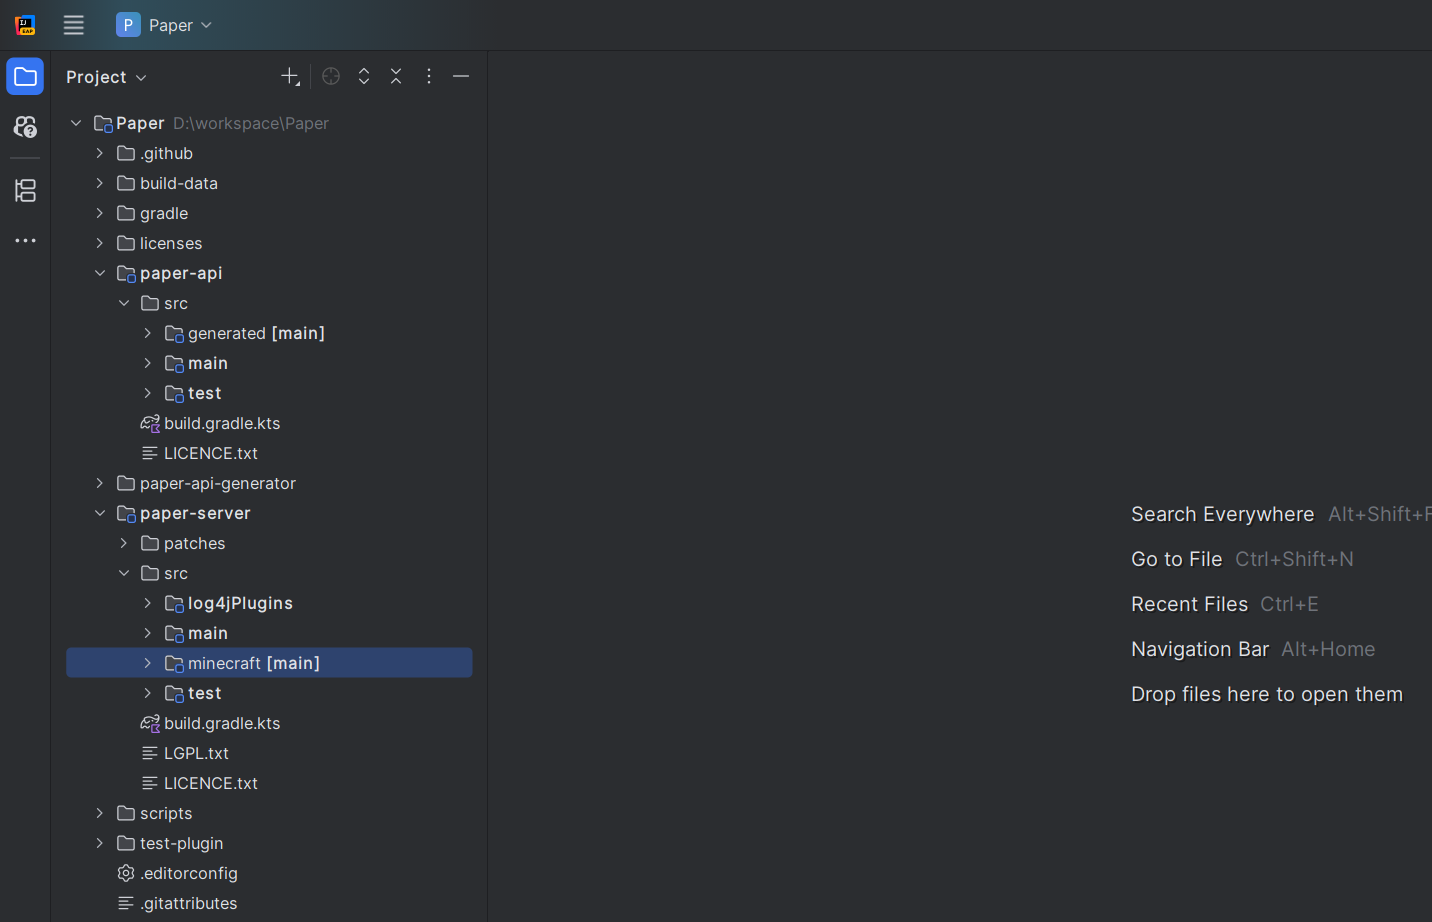
Generally speaking, all of the files and folders below EXCEPT for paper-server/src/minecraft can be edited normally.
I highligted the folder which, if edited, requires patches in the image below:
Editing NMS: Example
To edit a copyrighted file such as those in net.minecraft.server package, you need to work with patches.
This is because it is illegal to redistribute Mojang’s source code. Not even their official mappings permit free redistribution. Using patches is a gray but defensive legal area which has been working for years. The only downside is its complicated setup.
Let’s say I want to get rid of the annoying prefix Not Secure in the console if my server does not enforce secure profiles (meaning you do not permit chat being reported to Microsoft).
I have found the string in this class in the NMS package:
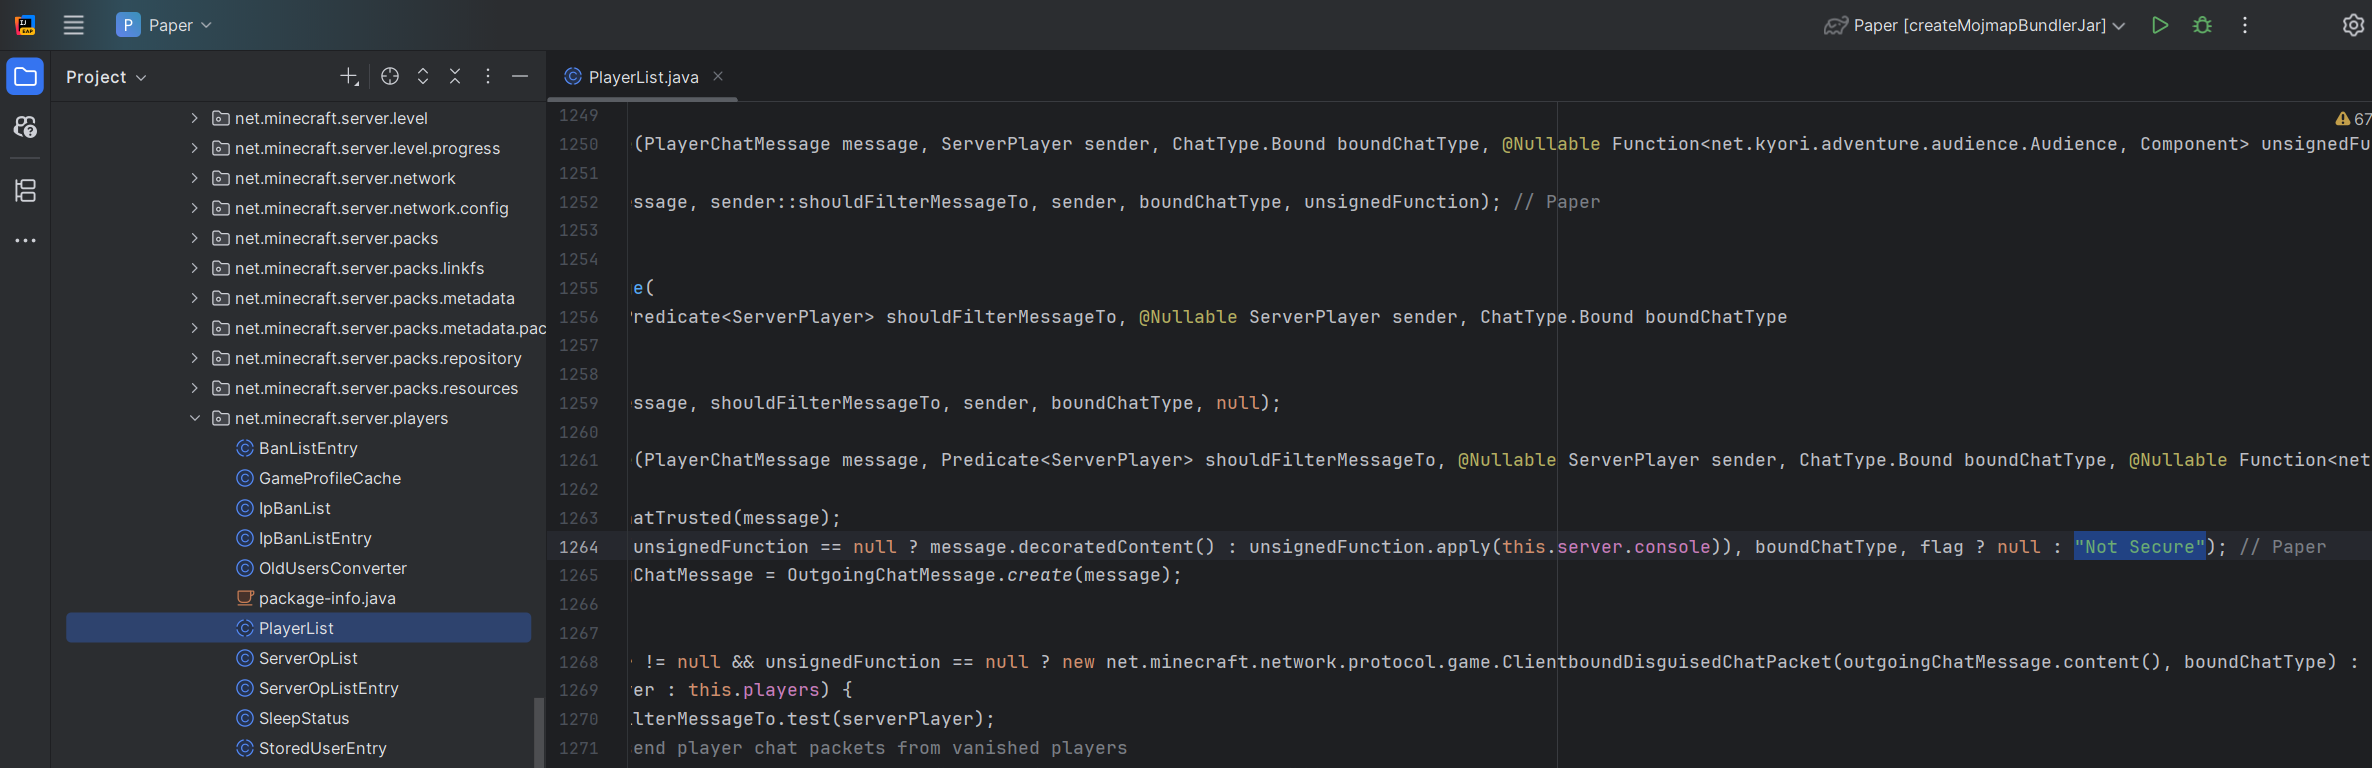
For the sake of the demonstration, I will change it to “Very Secure”. You can set it to null too to disable it.
After your are done, do not commit your changes yet.
Step 5: Creating A Patch
As a general rule, you could do the thing below, but you will notice it does not work:
You could use GitHub desktop client that will show you your edited file, you would then commit it, DO NOT PUSH IT, and finally run gradle rebuildPatches from tasks > minecraft patching should
However the problem with the above is that the minecraft folder is in .gitignore file so it is excluded by default.
This is again due to legal reasons where Paper only downloads and compiles the folder locally, but we cannot redistribute it to GitHub.
So, we need to manually commit the chanes and rebuild the patches in a bit more complicated way.
Commiting Changes
Open your terminal, cd into the folder where you edited the file. For me it was there:
cd D:\workspace\Paper\paper-server\src\minecraft\java\net\minecraft\server\players
Now add all changed files manually:
git add .
Repeat this for any other folder which you edited.
At this point, I have to admit this is an overcomplication, so feel free to suggest to me or to Paper an improvement in this process.
After you are done adding all edited folders, commit with a commit message as usual:
git commit -m "Chat is always secure"
By commiting manually, we are overriding the .gitignore rule. The console or terminal output should say something like this:

After you are done, DO NOT PUSH CHANGES yet.
Creating A Patch
Finally, run ./gradlew rebuildPatches in the main directory to convert your commit into a new patch. In IntelliJ, this is under Tasks > minecraft patching. Or you can use your console or terminal:
./gradlew rebuildPatches
Wait for the task to say BUILD SUCCESSFUL in the console.
Hurray, if you survived up to this point, you can check your shiny new patch in GitHub Desktop client. Note that the rebuildPatches task might update indexes for other patches automatically to keep them up to date.

Testing Your Changes
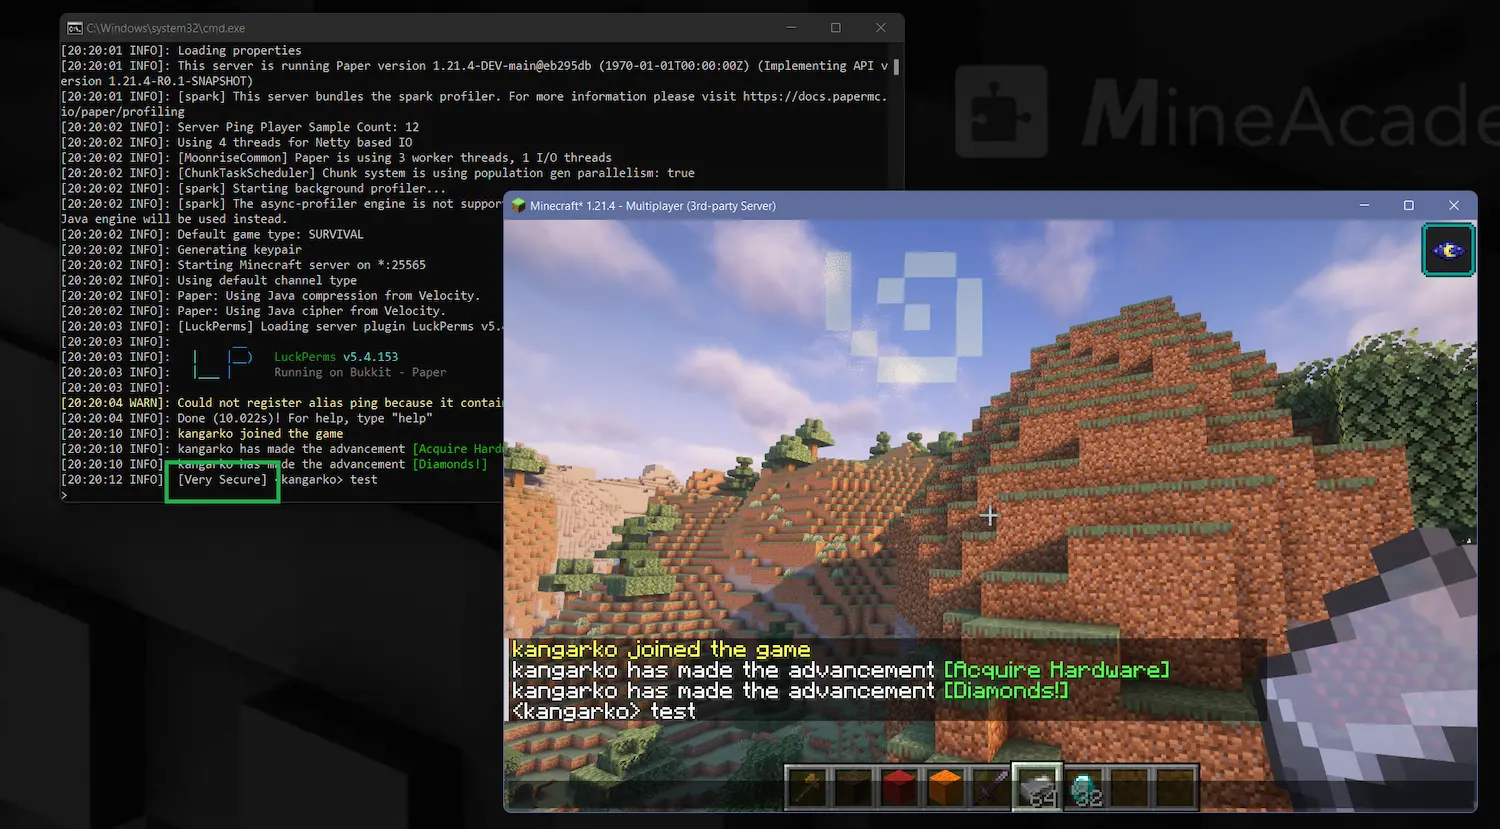
After you are done, run ./gradlew applyPatches and ./gradlew createMojmapBundlerJar tasks again (in that order), grab the new paper-bundler-X-R0.1-SNAPSHOT-mojmap jar file and start the server with it normally.
Now I can see that the Not Secure prefix has been changed. So much work for a simple change! I think I am gonna sell this as a premium privacy-enhanced fork for $199 on BuiltByBit now…
Step 6: Creating A Pull Request To Paper
After clicking “Push origin” you won’t be able to commit to Paper unless you are a collaborator:
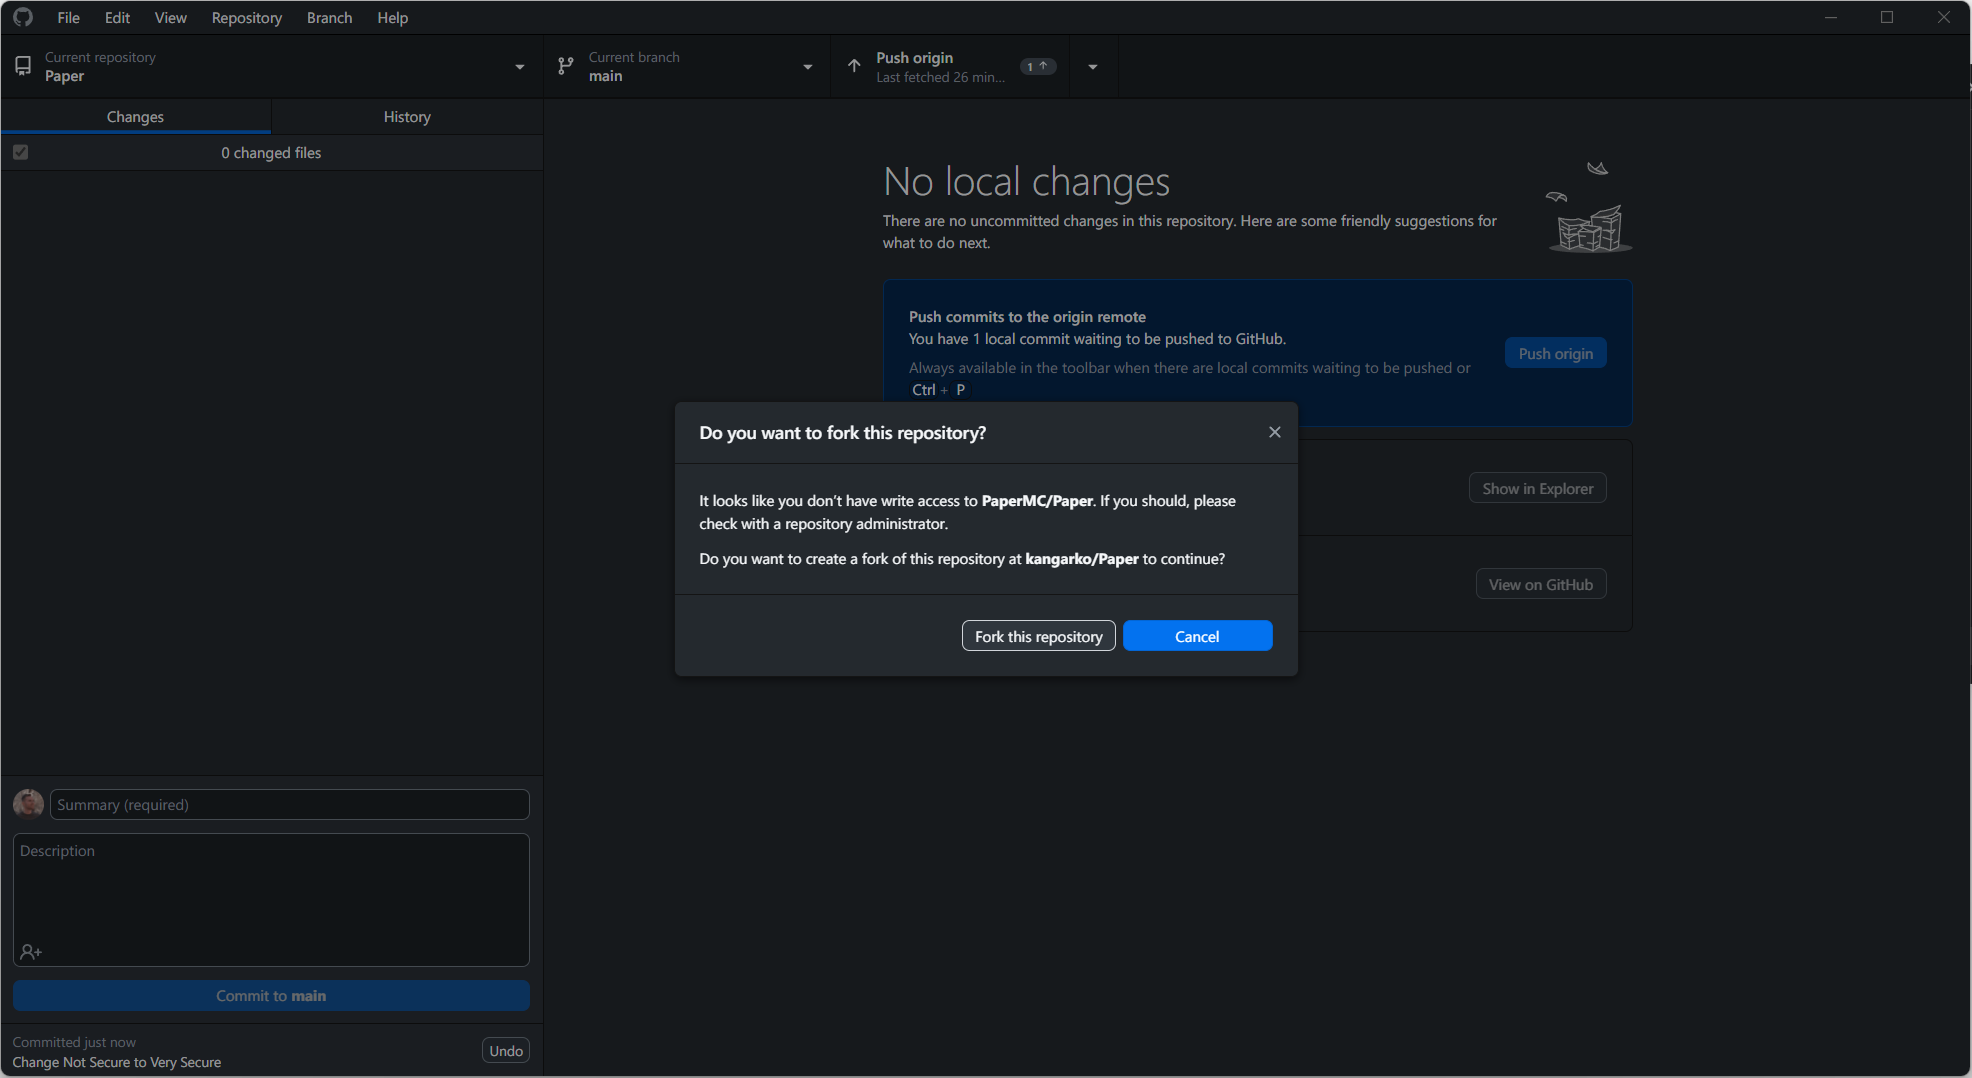
To send our “improvements” to Paper, we need to create a fork, and then make a pull request.
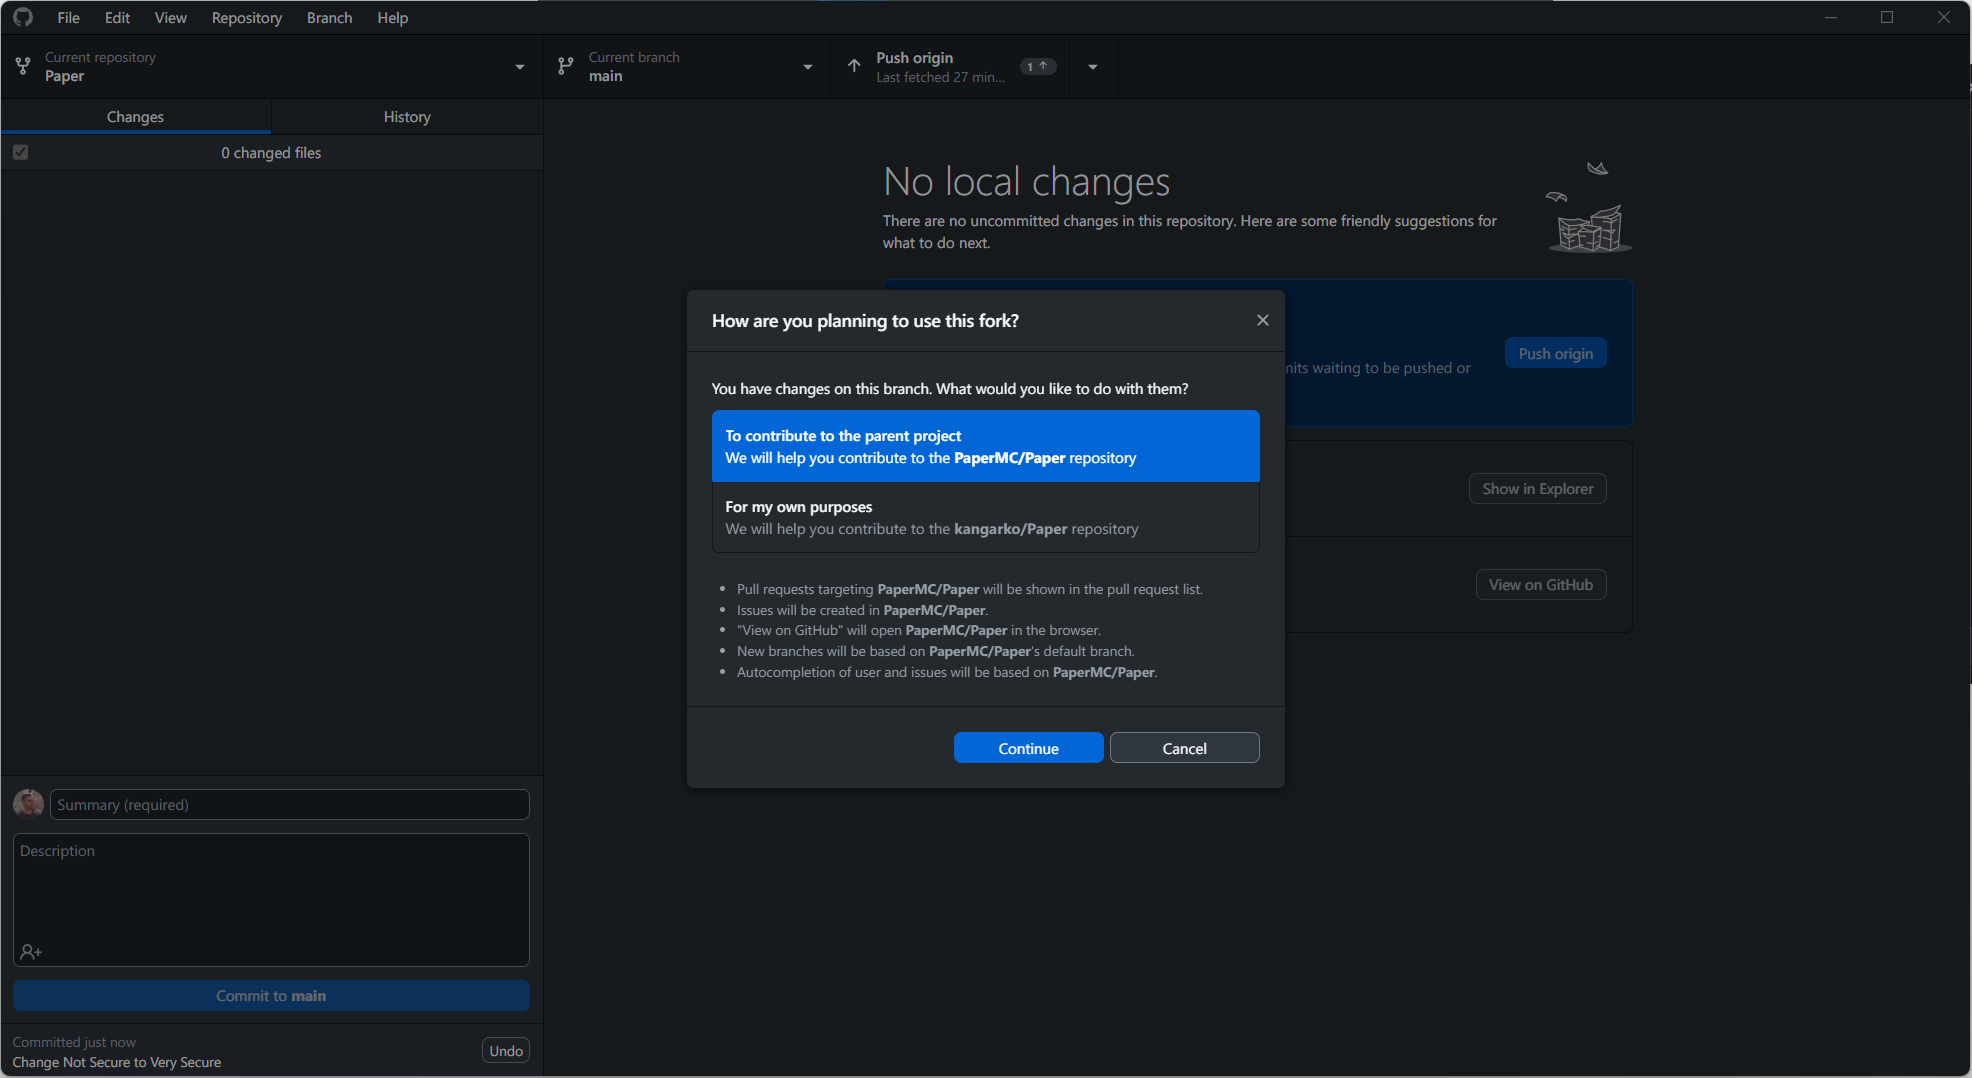
If you use GitHub Desktop, it makes it very easy to do with a button to push, see above. After clicking “Fork this repository”, select “To contribute to the parent branch” as the goal and hit “Continue”:
Finally, hit “Push origin” again, and this time the commit will get published to your own repo where your fork is, mine is at: https://github.com/kangarko/Paper.
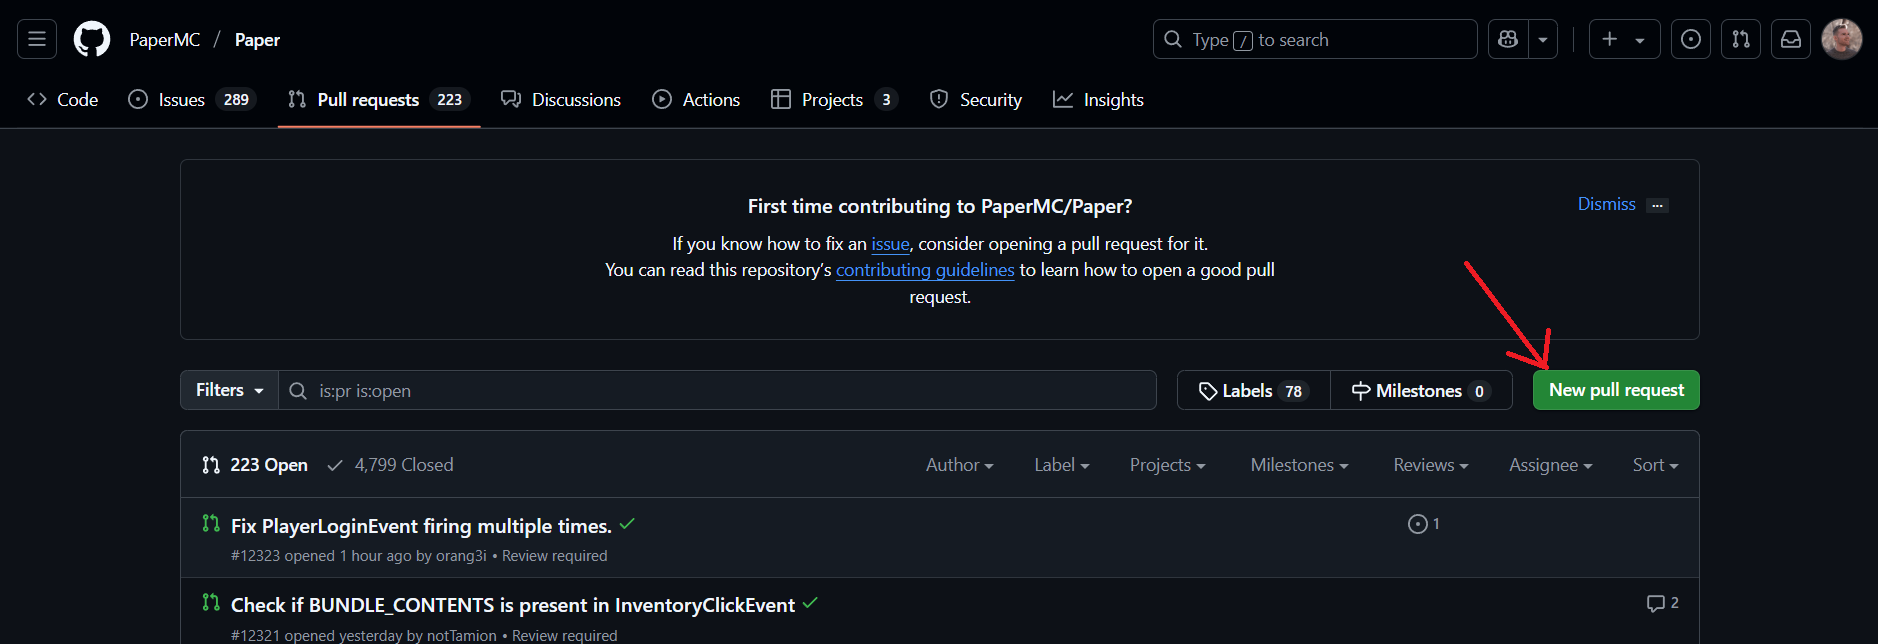
Now, head back to the Paper repo on GitHub and click Pull Requests to go to https://github.com/PaperMC/Paper/pulls.
Click “New pull request”:
In the next screen, click compare across forks:
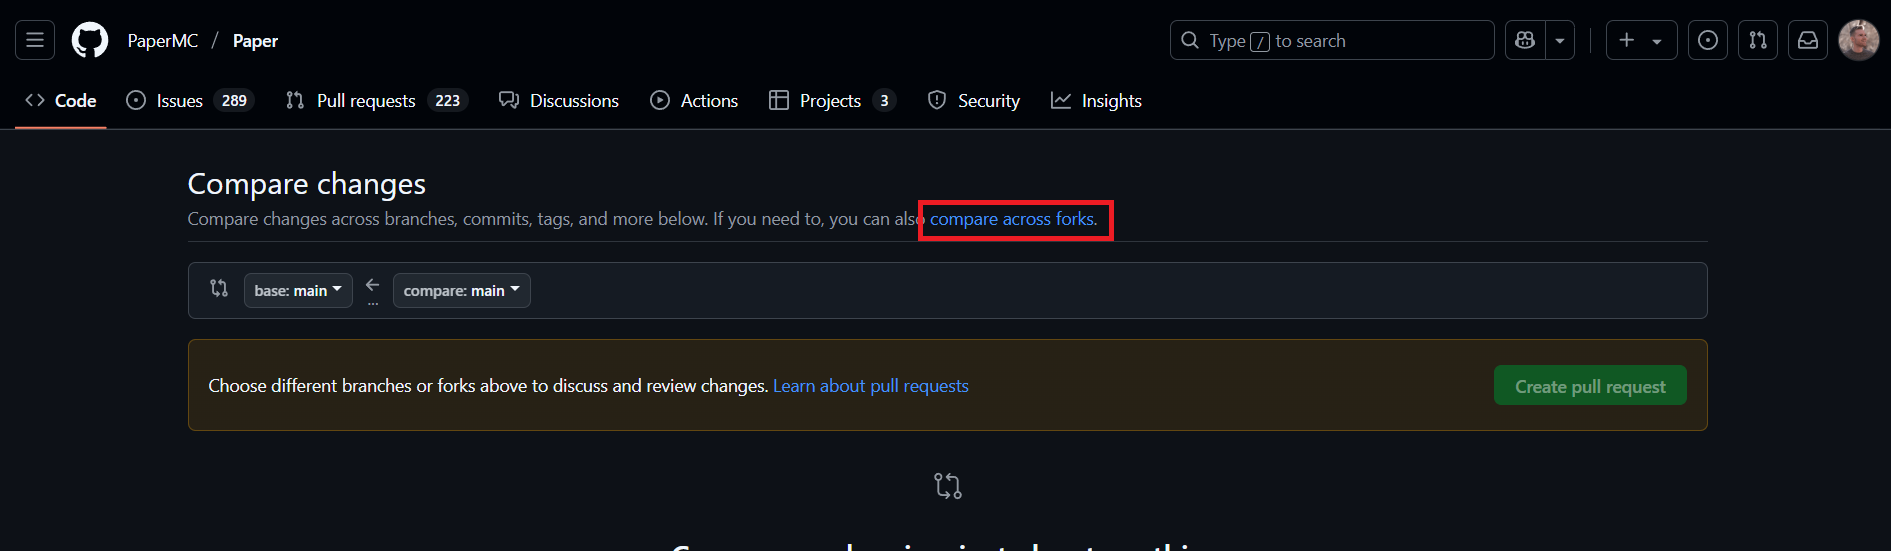
In the next screen, click compare across forks.
The base repository should be PaperMC/Paper, and the head should be yours. Careful to compare in the main branch of whichever you want to contribute to.
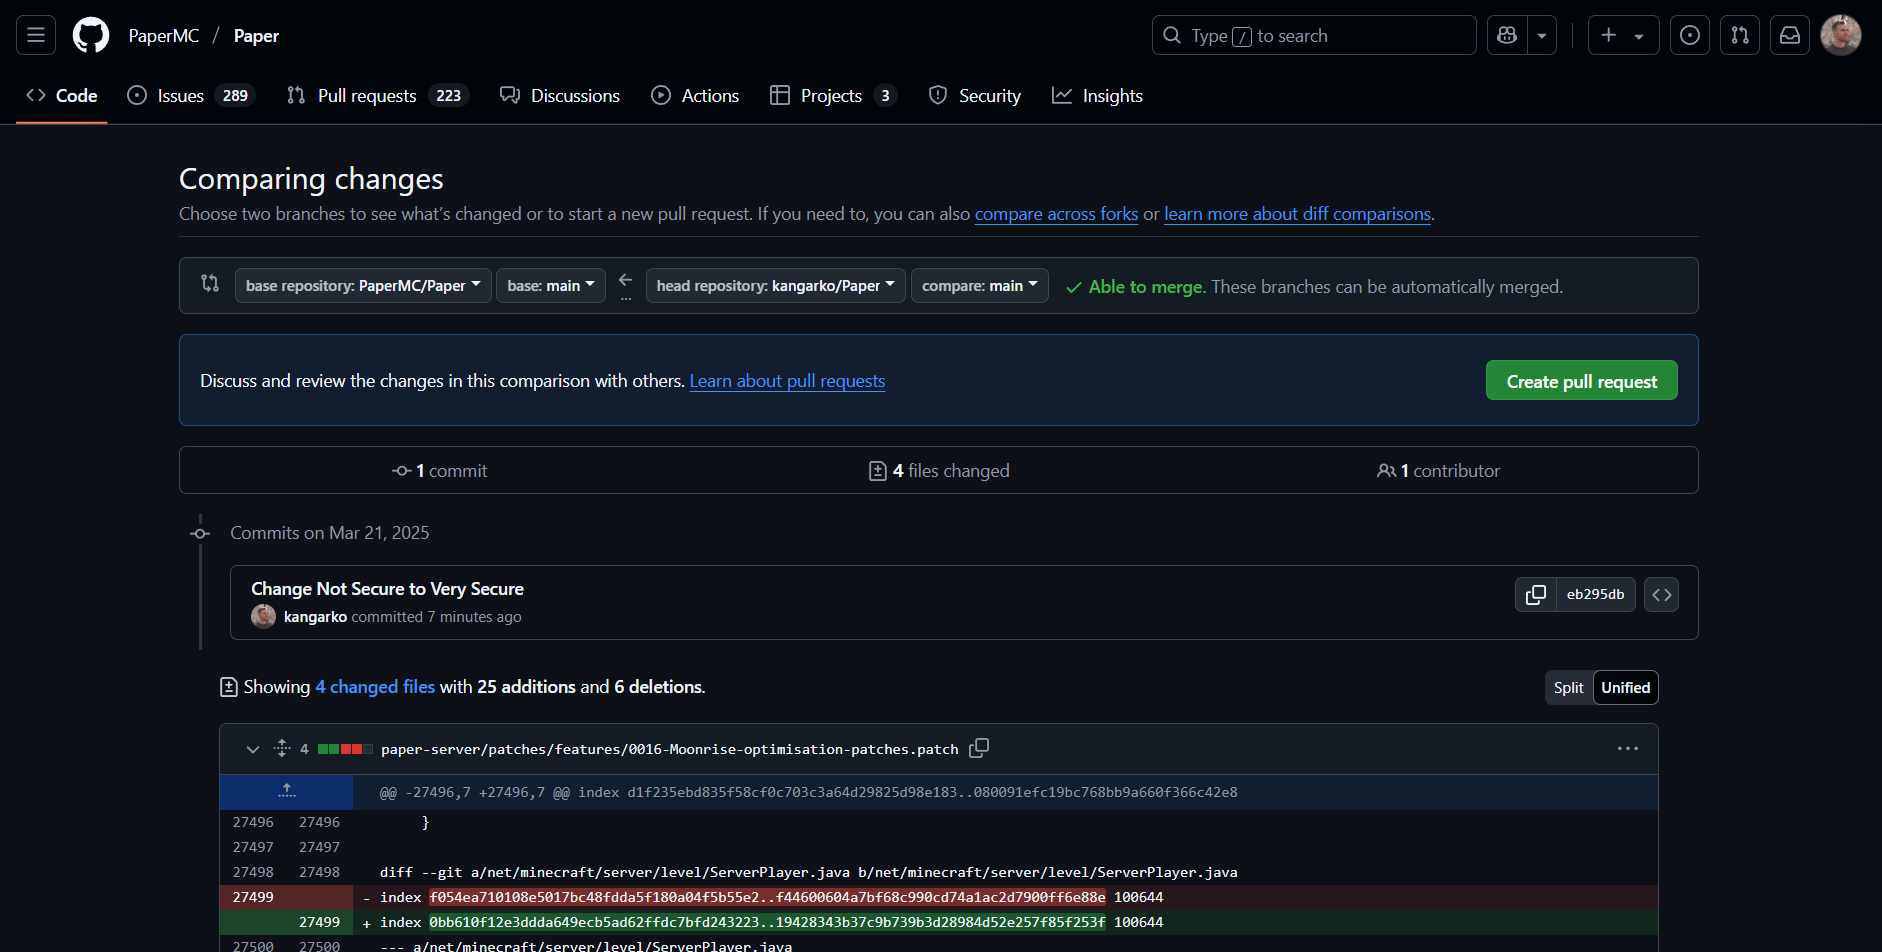
If you have done everything correctly, you should see the pull request like I do below. Simply click the Create pull request button and you are done!
Important Notes
Here are some very important considerations when forking Spigot, Paper, UniverseSpigot, BeerSpigot or any other fork.
#1 You need to learn Java first
This should go without saying. You can’t use AI to mask lacking Java knowledge, and this principle will continue at least for the next 2-3 years.
At MineAcademy, we created an entire Java+Paper API programming class called Project Orion.
Alternatively, I recorded over 60+ free coding tutorials on my YouTube channel.
Whatever path to learning programming you chose, master Java first before attempting to create the next “high performance Spigot fork”.
#2 Changing One Thing Might Silently Break Two
Some people, in hopes of improving server’s performance, fork it and rip off things from the main thread onto a separate executor.
Unfortunately, this breaks things because of how complex the codebase is. And given the amount of game rules in today’s Minecraft, I advise to move extremely conservatively with these “high performance edits”.
Also, you will notice that not all NMS classes are available in your codebase, which brings me to the next point:
#3 Not All NMS Classes Are In Your Codebase By Default
By default, Paper (and Spigot) only import files we make changes to. If you would like to make changes to a file that isn’t present in paper-server’s directory, you need to add it to Paper’s import script.
See this article on adding new NMS classes to your codebase.
…
I hope you have enjoyed this article, go and create some amazing forks and share them in our mineacademy.org/discord community!
Matej